Image Map

Monday, January 26, 2015

Decadent SKINNY Chocolate Cake


In my world opposites quit frequently attract.  Loud noises make me crave quietness.  Dark rooms usually suggest providing some light into the room. Cold floors make me want to have warm socks on my feet. And wanting to loose weight usually makes me search out chocolate night and day.  Yup, opposites do attract for me.  As we come out of the holidays into the NEW year I feel a strong tug towards shedding those extra "Thanksgiving, Christmas and New Year's pounds" yet all I can do keep myself from eating chocolate is maddening.  Chocolate is mouthwatering.  It's comfort food to me.  It just tastes so good! Yet my clothes feel a bit tighter than they did back in the beginning of November before all the holidays kicked into full swing deliciousness.  Thus my ambition to make better food choices at meal and snack times has been a constant priority.  And well, chocolate at every meal and snack really should just NOT happen.  It won't help my pants from feeling snug.  My brain knows this but does my taste buds and will power know this too? Goodness it better, real fast.  And SOON!!


Recently my world of opposites came to a happy, happy place.  Through my January assignment on the Secret Recipe Club I discovered a fantastic recipe for chocolaty chocolate, decadently decadent CHOCOLATE cake on the blog, Burnt Apple. Oh yes, a cake full of sinful chocolate yet NOT full of fat.  My pants still fit nicely even after eating a piece of this cake! And my need for chocolate was completely satisfied too! The best. 

Burnt Apple is a treasure of a blog as it is packed with many, many recipes that are delicious in taste yet conscious and brilliantly altered to have a healthy make-over.  The ingredients used in the recipes are budget friendly for families of all sizes too.  I have my eyes on a couple more recipes from Burnt Apple such as the Whole Grain "Sour Cream" Coffee Cake Bread and the Pear Walnut Waffles.


For this cake,  plain Greek yogurt and unsweetened apple sauce help reduce the usual amount of fat found in a good chocolate cake.  The addition of hot coffee helps enhance all of the chocolate flavor in the unsweetened powdered cocoa and mini chocolate chips.  As suggested in the original recipe I chose to finish off my cake with a lovely chocolate ganache poured on top of it.  This cake is truly a decadent treat even if the fat and calories are less than in a normal chocolate cake.  I will definitely make this cake again when my chocolate cravings take over my will power of super powers.  

Skinny Chocolate Cake 
         (Recipe from Burnt Apple)

Ingredients:

For the cake - 
1 cup unsweetened cocoa powder
2 1/2 cup all-purpose flour
2 1/2 tsp baking soda
1 1/4 tsp salt
1 1/2 cup sugar (the original recipe calls for 1 3/4 cup sugar)
1 tsp vanilla extract 
3 eggs
1 1/4 cup non-fat plain Greek yogurt
1 cup unsweetened apple sauce  
1 1/4 cups HOT coffee (milk or hot water can be substituted in place of coffee if you wish) 
1/2 cup mini semi-sweet chocolate chips 

For the chocolate ganache:
1 cup chocolate chips - dark, milk or semi-sweet is great
1/2 cup heavy cream - 1/4 cup of milk can be used (I used 1/2 cup of half and half with success) 


Directions:

Preheat oven to 350 degrees F.  Grease and flour a 10-12 cup bundt pan.

In a large bowl whisk together the unsweetened cocoa powder, flour, baking soda, salt and sugar making sure all are incorporated well.

Mix eggs, yogurt, applesauce in a medium bowl and then pour into dry mixture.  Stir to incorporate and then add in hot coffee.  Stir well all together.  Add in mini chocolate chips.

Pour batter into prepared bundt pan.  Bake for 45-50 minutes or until toothpick inserted into center of cake comes out clean.  Cool cake and then invert onto a serving platter.  

While cake cools make chocolate ganache. Pour chocolate chips into a medium size bowl.   In a small sauce pan heat cream (or milk) to a gentle simmer.  Pour hot cream over chocolate chips and then stir together carefully with a rubber spatula.  Mixture will thicken as the chocolate melts into the cream.  It's really magic in a bowl.  Pour ganache over cake.  Sprinkle with mini chocolate chips if you wish.  Serve and enjoy to the fullest.


Happy Skinny Chocolate Cake Baking!


Saturday, January 24, 2015

EASY Sesame Chicken


I cook a lot of chicken for my family.  That's no lie.  Everyone in my house likes chicken and well yes, it's good for you.   I will often buy at least 4 lbs of boneless skinless chicken breasts at a time and divide and freeze it up.   I can then just grab a bag of frozen chicken in the morning out of the freezer to defrost in the sink during the day and when it is time for dinner prep the breasts are ready to go. 


Of course the hard part comes when I have to figure out HOW to cook or bake the chicken.  Do I make a simple stir fry (for the 3rd time this month) or cube into pieces for breaded chicken nuggets or do I bake it in the oven, seasoned well along with a dash of prayer for it to remain moist?  So yes, I do often lack in creativity with all my stock in chicken breasts.  I find myself radiating often to the "chicken boards" on Pinterest in desperation for a new, fantastically DELICIOUS and SIMPLE recipe that will make my kiddos and my darling Jeff swoon with happiness over their dinner plates.


Believe it or not "swooning" did happen just the other night when I made this very dish that you see above.  Yes, purely simple and lovely, lovely praise over the delicious taste of Sesame Chicken that I, myself made with my own two hands came from the mouths of my family.  Honestly, I couldn't blame them!  This recipe for Sesame Chicken is perfection!  It tastes just like the Sesame Chicken we order from Lee Mt. Fuji (our favorite Chinese restaurant). All the flavors of tangy sweetness along with the hint of salt surrounding the tender chicken tenders is there.  And the best part is that YOU can make this very dish yourself and have the pleasure of having all your dinner companions "swoon" with happiness and admiration for YOU over the dinner you just prepared.  Just follow the recipe below.   


EASY Sesame Chicken
(recipe slightly adapted from Cinnamon Spice and Everything Nice)

Ingredients :
3-4 chicken breasts - boneless and skinless, cut into 2" cubes
salt and pepper to taste
2 whole eggs or 3 egg whites 
1/3 cup cornstarch
4 tablespoons olive oil or canola oil
2-3 green onions - sliced thin
 

Sauce Ingredients:
1/3 cup soy sauce
1/4 cup honey
2 garlic cloves, minced
fresh ginger - 1/2" grated or minced 
3 tablespoons sesame seeds

Directions:

In a large bowl whisk together eggs and cornstarch until they are well incorporated.  Toss in chicken cubes to coat.  

Heat a large frying pan with oil.  Once oil is hot add in egg coated chicken.  Cook chicken until golden brown on all sides and fully cooked - about 5-7 minutes. 

While chicken is cooking make sauce - whisk all together in a medium size bowl soy sauce, honey, minced garlic, freshly grated ginger and sesame seeds.

When chicken in fully cooked add in prepared sauce. Toss chicken with sauce to fully coat.   Sauce will thicken as it simmers with the chicken.  Take pan off of heat and serve chicken over rice along with steamed broccoli.  Sprinkle sliced greens onions over chicken to garnish if desired.  ENJOY!


Happy Sesame Chicken Cooking!


Sunday, January 11, 2015

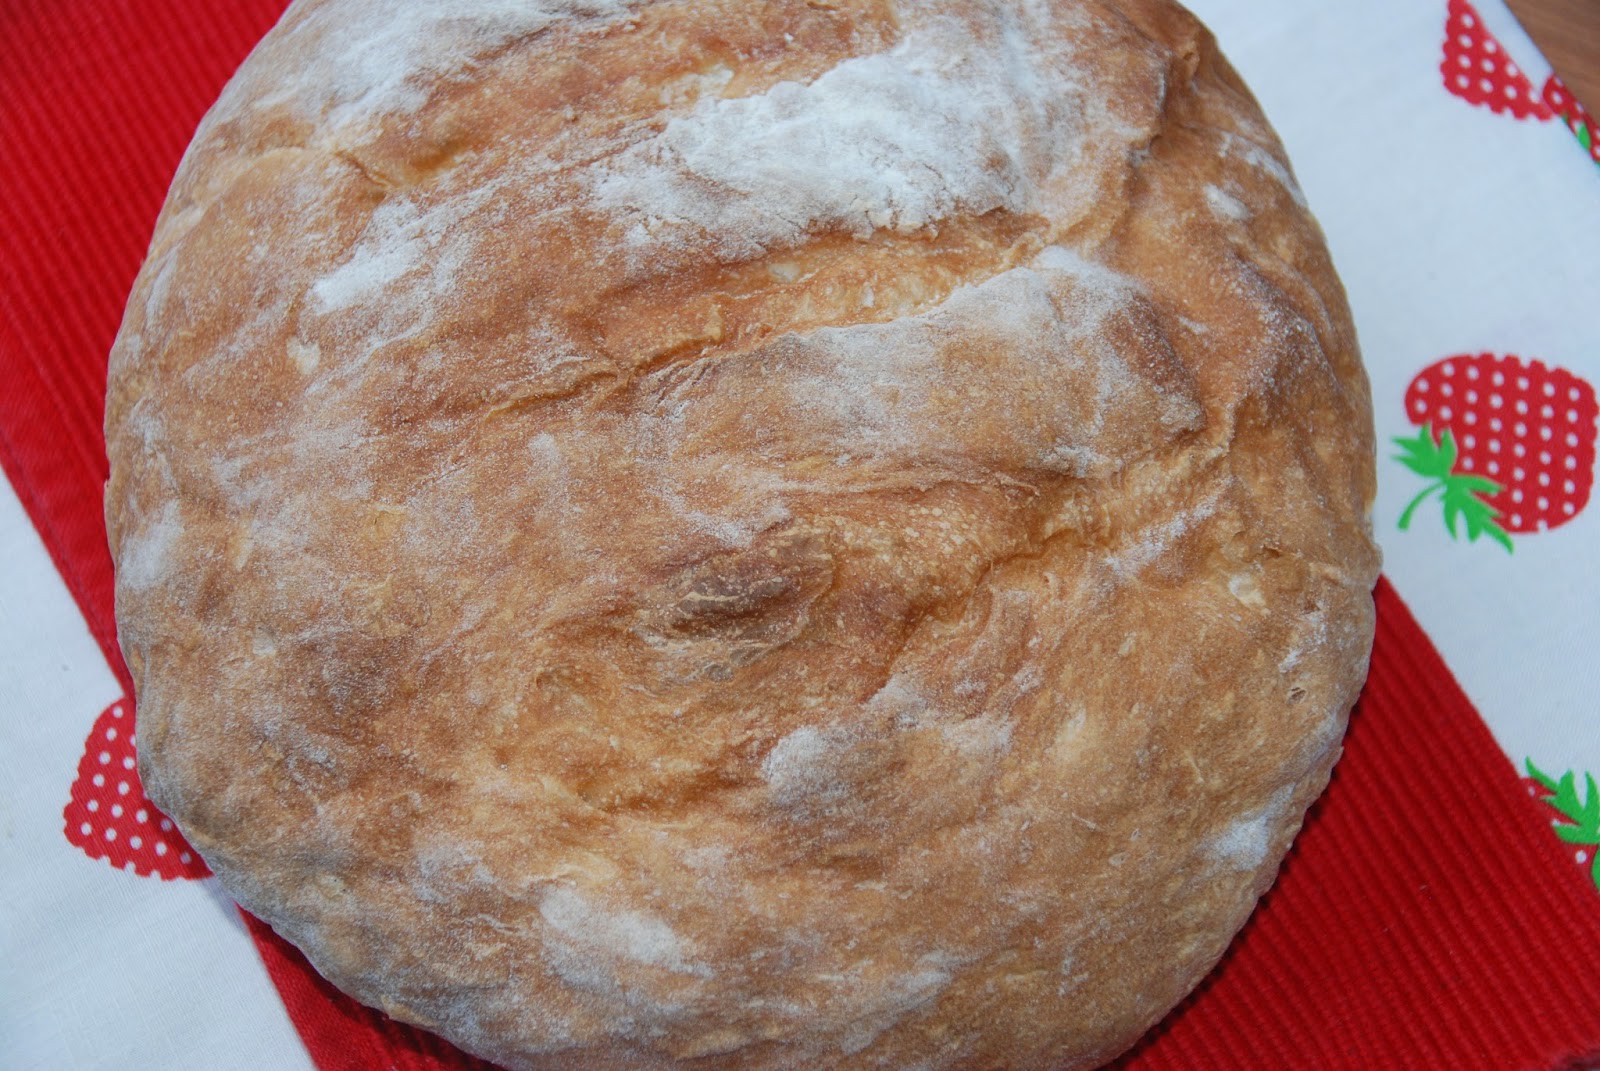
(EASY) Rustic Homemade Bread

2015 has officially arrived.  With this arrival I feel that it is important to enter into the NEW year with a really good recipe for homemade, made from scratch, delicious bread.  Who can't use such a thing? I guess those that are living a gluten free life-style might fall into such a category - but for those bakers and gluten eating people out there, this recipe that I share with you today will be greatly and fully appreciated.  


It is a super simple recipe.  It makes TWO large loaves and uses only 4 ingredients (yeast, flour, salt and water).  And the best part is that it is mixed, risen, shaped, risen again, baked and placed into your mouth all within a 3-4 hour period of time. You really can't go wrong by making this recipe.  It is completely the best thing since sliced bread in my opinion.  And yes, it does even slice well.


My family enjoyed it first straight out of the oven with a little smattering of salted butter along side a hot cup of tea.  We then moved onto lightly toasting the bread and layering on butter and jam.  Goodness was that just divine!


We also made big fat tuna melts on it and then delicious french toast.  The french toast was my favorite if you were wondering.  Although I do have to say that when I had the bread toasted and buttered it and then laid on some Bonne Maman mixed berry jam my heart did do a little pitter patter of happiness.  It was just SO good. 

So join me in my happiness over this Rrrrrustic Homemade Bread recipe and grab your yeast, flour, salt and water to mix up a beautiful dough.  You can thank me later.


Rustic Homemade Bread 
(recipe discovered on Somewhat Simple)  
makes 2 large loaves 
 
Ingredients:
3 cups warm water (not too hot as you don't want to kill the yeast)
1 1/2 tablespoon yeast - I used fast-acting but regular is fine too
6 1/2 cups flour 
1 tablespoon salt  

Directions:

1. In a large bowl sprinkle yeast over warm water and gently stir.  Let sit for 10 minutes so the yeast can really come alive and grow.

2.  Add in flour and then salt to the yeast and water mixture.  Stir all together until no remaining dry spots .  Cover bowl with a clean dish towel and then place bowl in a draft-free location.  All dough to rise for about 1-2 hours - it will double in size.  My dough only took 1 hour to full rise - it all depends on how warm your home is.  

3. Once dough has doubled in size divide in half and place each half on a piece of lightly floured parchment paper.  Gently form into a nice rounded bread shape.  Flouring your hands will help for this step.  Cover your breads and allow to rise again - about 30-45 minutes. With a serrated knife cut three slits across each bread.....


4. Preheat oven to 450 degrees F.  Place parchment paper and bread dough onto an upside down cookie sheet or pizza stone and then pop into the oven.  On the rack below the bread place a large roasting pan and fill with water about 1" high.  The steam from this water will give your bread a lovely crusty crust.  Yum! I baked the loaves of bread one at a time.

5. Bake bread for 24-28 minutes - until loaf of bread is a beautiful golden brown.  Cool, slice and enjoy! 


Happy Rustic Homemade Bread Baking!

LinkWithin

Related Posts with Thumbnails

ShareThis