Image Map

Monday, September 27, 2010

Zucchini Spice Cake with Maple Cream Cheese Frosting


Ahhhh the beauty of zucchini! - it is such a lovely vegetable.  Not only can it be made into something salty and savory (such as Zucchini Mac n Cheese) but it also can be made into something sweet and moist (such as Yummy Zucchini Cookies).  A very versatile offering from our Dear Mother Nature.

I've recently come upon a lovely blog called My Baking Addiction - I often feel like I have an addiction to baking (yeah, like every day!) so of course I was immediately drawn to this blog just because of it's name.  Well, once I started browsing through the blog I also became instantly in love with all of Jamie's recipes!!!!  My goodness a gold mine of fabulously amazing baking (and cooking) recipes!!!  This is where I discovered the lovely recipe of Zucchini Spice Cake with Maple Cream Cheese Frosting.  Not only did I love the idea of using up some of the zucchini that desperately needed a home in a recipe but I was delighted to make a frosting that had none other than NH's finest maple syrup in it.  Hip Hip HOORAY!  I was NOT disappointed by this recipe.  As I know you will not be either. So go ahead and grab that zucchini that is calling your name and couple tablespoons of maple syrup and whip up this d'lish cake.


Zucchini Spice Cake with Maple Cream Cheese Frosting
(recipe adapted from My Baking Addiction)


Cake Ingredients:


1 1/4 cup flour
1/2 cup brown sugar
1/2 sugar
1 1/2 tsp cinnamon
1/2 tsp ground cardamom (optional) - I didn't have this hand so I didn't use it
1/2 tsp nutmeg
1/2 tsp minced crystallized ginger (optional) - nor did I have this on hand
1/2 tsp salt
1/2 tsp baking powder
1/2 tsp baking soda
1 cup veggie oil (or you could use 1/2 cup veggie oil and 1/2 cup applesauce)
2 eggs
1 tsp vanilla extract
1 cup grated zucchini

Frosting Ingredients:


4 oz. cream cheese, softened
3 Tbsp unsalted butter, softened
2-3 Tbsp PURE maple syrup
1/2 tsp cinnamon
2 cups powdered sugar

Cake Directions:

1. Preheat oven to 350 degrees F. Grease an 8x8 baking pan and set aside.

2. Combine in a large bowl flour, spices, salt, baking powder and baking soda...


...and mix well.

3. In a medium bowl combine oil, eggs, sugar, vanilla extract and grated zucchini...


....and mix until thoroughly combined.

4. Add zucchini mixture to the flour mixture.  Stir until thoroughly combined.  Pour into prepared 8x8 baking pan....


5. Bake for 35-40 minutes or until toothpick inserted in the middle of the cake comes out clean.  Cool cake completely.  You can either remove cake from pan before frosting or frost directly in pan.

Time to make the delectable frosting....

Frosting Directions:

1. Beat together the softened cream cheese and butter until smooth and fluffy.  Add in maple syrup and then powdered sugar and cinnamon....


....beat all together to combine into one happy smoothness.....


.....a scrumptious treat of a frosting.....


.....frost cake as desired and enjoy! 


Happy Zucchini Spice Cake with Maple Cream Cheese Frosting Baking! 


Friday, September 24, 2010

Banana Cupcakes with Peanut Butter Frosting


I often feel like I am on the constant search for new and exciting recipes that involve bananas.  Bananas that are in need of being used in a baked good seem to always appear in my presence. I'm a lucky girl!

  I love banana bread don't get me wrong.  I have in the past year discovered that the best way to make banana bread is to have a recipe that includes either sour cream or yogurt in it.  Sour cream or yogurt always gives me a nice moist and tasty result to my banana bread.  I am realizing now that I have actually yet to share on my blog my most favorite banana bread recipe.  Gosh, I've got to get my bum in gear in do so! ;-)

In my most recent search for a "new" banana recipe I came upon Banana Cupcakes with Peanut Butter Frosting.  A fun, easy and delightful recipe! The cupcakes were moist with a delicate but perfect banana flavor and the frosting was well, sinfully delish.  I think you will like this recipe as much as I did (and those that I shared the cupcakes with too).

Banana Cupcakes with Peanut Butter Frosting
(recipe from TK member, thesweetandsalty)

Cupcake Ingredients:


1 1/2 cups sugar

1 stick butter, unsalted - at room temperature

2 whole eggs

1 1/2 tsp vanilla extract

2 cup flour

1/4 tsp baking powder

1/4 tsp baking soda

1/4 tsp salt

1 cup buttermilk - I like to make my buttermilk but adding a tsp of lemon juice or vinegar to my measured milk

1 1/4 cup mashed banana - about 3 ripe bananas

Frosting Ingredients:


2 cups powdered sugar

1 stick butter, unsalted - at room temperature

1 tsp vanilla extract

1 cup creamy peanut butter

3 Tbsp milk or 1/2 and 1/2

Cupcake Directions:

1. Preheat oven to 350 degrees F.  Line regular (mini or jumbo size is fun too if you wish) size muffin tins with cupcake liners.

2. Cream together butter and sugar until light and fluffy.  Add in eggs and vanilla extract.  Mix well all together until smooth

3. In a separate medium size bowl combine all dry ingredients - flour, baking powder, baking soda and salt.

4. Alternate adding in the dry ingredients and the buttermilk to the butter/egg mixture. Mix until well combined.

5. Gently fold in mashed bananas into mixture.

6. Scoop batter into lined muffin tins.  You want to fill the cups about 2/3's of the way full. 

7. Bake in preheated oven for 25 minutes or until lightly browned.  Cool completely before frosting.

Peanut Butter Frosting Directions:

1. Combine softened butter and peanut butter - beat until light and fluffy.

2. Add in vanilla extract and then powdered sugar.  Once well combined add in milk.  Beat until smooth and spreadable.  Add in more small amounts milk if needed.

3. Spread onto cooled cupcakes as desired.  I just used a butter knife to do so.  I dream of being able to frost cupcakes with a frosting tip and bag.  I have been watching videos on other blogs and gathering the right tools in hopes that soon I will be able to teach myself how to do this. :-)


Enjoy!

Happy Banana Cupcakes with Peanut Butter Frosting Baking!

This post has been linked up to....

Friday Favorites @ Simply Sweet Home

Monday, September 20, 2010

Apple Crostata


Sometimes I discover a recipe and I know as soon as I take the first bite that I will make it again and again and again.  Other times unfortunately, I don't feel like I will repeat the recipe.  Well, with this scrumptious recipe for Apple Crostata I can not wait to make it again!!!!  Oh my, it is mouth-watering delicious!  The crust is super easy to make (especially if you have a food processor) and sooooo flaky good.  The apple filling is simple - the hardest part about it is prepping the apples (peeling, coring and then cutting into chunks).   The crumb topping is the final step to the recipe which brings this whole apple of a treasure dessert together....bringing in a cinnamon sweetness that just melts into the apples.

Go ahead and impress yourself - and your taste buds - and make this Apple Crostata....your eyes will roll back into your head with happiness and a fireworks worth of sweet deliciousness all at once when you take your first bite. 

The beauty of this dessert is that the next morning you can gently heat it up and have it for breakfast and it will taste just as amazing as the first time you enjoyed if not better - I know this personally for I had the last slice for breakfast the a.m. after I had made it....what a great way to start my day!  ;-)

Apple Crostata
(recipe adapted from Lovin' From the Oven which was found from Ina Garten)


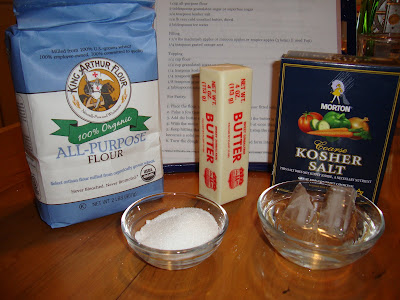
Pastry Ingredients:


1 cup flour

2 Tbsp sugar

1/4 tsp kosher salt

1 stick unsalted butter, VERY cold and diced

2 Tbsp ice cold water


Filling and Topping Ingredients:


3-4 medium Macintosh apples (or baking apples of your choice)

1/4 tsp grated orange or lemon zest (I didn't have a single piece of citrus in my house so I used just a splash of lime juice)

1/4 cup flour

1/4 cup sugar + 2 Tbsp

1/4 tsp kosher salt

1/2 tsp cinnamon

1/4 tsp nutmeg

4 Tbsp unsalted butter, COLD and diced


Pastry Directions:

1. Place the flour, sugar and salt in the bowl of a food processor fitted with a steel blade. Pulse a few times to combine.

2. Add in the butter...


and pulse 15-18 times, or until the butter is the size of peas.

3. With the motor running add in ice cold water all at once through the feed tube. Keep hitting the pulse to combine, but stop the machine just before the dough becomes a solid mass. 

4.  Turn the dough out onto a well floured surface and form into a disc.  Wrap with plastic wrap and refrigerate for at least 1 hour.  Make filling and crumb topping while waiting for pastry dough to chill.

5. Peel, core and cut apples into 8th's then cut each wedge into 3 chunks ....


  Sprinkle with 2 Tbsp's of sugar and then the grated lemon or lime (in my case I sprinkled a dash of lime juice over the apples).  Set fruit aside.

6. Make crumb topping....start by combining flour, sugar, salt, cinnamon and nutmeg into a medium bowl.  Add in diced COLD butter and cut in with a pastry cutter (LOVE this kitchen gadget!!!) or 2 knives.  Topping should be nice and crumbly...


7. Preheat oven to 450 degrees F. Bring pastry dough out of refrigerator.  Roll out on a lightly floured surface to at least an 11" circle - I rolled mine out directly onto my Silpat and then transferred to a cookie sheet before I filled the dough.

8. Scoop apple filling onto the pastry dough.  If any liquid has accumulated with the apples be sure to leave it behind in the bowl.  You don't want any extra liquid at this point with the apples on the pastry dough.  Leave about 1 1/2 inch worth of a border around the  pastry dough....


....and then sprinkle crumb topping over apples....


... gently fold over the pastry border to surround the apples and topping...


9. Place crostata in preheated oven and bake for 20-25 minutes - until crust is golden brown and the apples are tender....


...Cool slightly and serve warm or at room temperature - good vanilla ice cream is a lovely partner with this dessert...or served alone is just as yummy!


Happy Apple Crostata Baking!

Friday, September 17, 2010

French Rustic Tomato Tart


Got tomatoes?  Lots of tomatoes? Well, have I got a treat for you!  This lovely savory tart is just the ticket for all your FRESH from the garden (or FRESH from the g-store) tomatoes.  Just follow the recipe below to make the d'lish crust, layer with good mustard, sliced fresh tomatoes, sprinkle with fresh herbs and then of course fresh mozzerella cheese and bake. Sooooo good!


I owe all this yumminess to Leigh Anne at Your Homebased Mom.  I stumbled upon her blog a couple of weeks ago and have been over joyed with all the amazing recipes she has to offer.  Go check her blog out for yourself....let me know what recipes appeal to you just in case I have yet to come upon them. ;-)

French Rustic Tomato Tart
(recipe from Your Homebased Mom)

Crust Ingredients:

1 1/2 cups flour
4 Tbsp butter, cold and cut into cubes
1/2 tsp salt
1 large egg
2-3 Tbsp cold water

Tart Filling Ingredients:

3 Tbsp Dijon or whole-grain mustard
2-3 large fresh tomatoes
2 Tbsp olive oil
salt and pepper
2-3 Tbsp *freshly chopped herbs - such as basil, chives, parsley, thyme or tarragon *(If you don't have fresh herbs go ahead and use 2 tsp of dried herbs instead)
8oz fresh mozzerella cheese

Directions:

1. Make the crust. Mix flour and salt in a medium bowl.  Add in diced and chilled butter...


  With a pastry blender or your hands blend until full incorporated and crumbly.

2. Beat egg then add in 2 Tbsp of cold water....


....and mix.

3. Make a well in the center of the flour/salt mixture then pour in egg mixture....


...stir all together until dough comes together.  If it's not coming together add another tablespoon of cold water.

4. Gather dough into a ball.  Transfer to a lightly floured surface and roll out to about 14 inches across.  I rolled my dough out directly on my Silapat (parchment paper would work well too) - which I lightly floured and then transfered to a cookie sheet before I filled the center of the tart dough...


5. Preheat oven to 425 degrees F.  Spread mustard in an even layer all over dough and let it sit a few minutes to dry out.....


6. Slice tomatoes and arrange over mustard in a single layer leaving about 2 inches between tomatoes and edge of dough....


....Drizzle with olive oil and then sprinkle with herbs....


....and then the fresh mozz cheese slices sprinkled with salt and pepper and more herbs if you wish....


7. Gently fold crust edges all around the filling....


8. Place tart in oven and bake for 30 minutes.  Crust should be light brown, tomatoes tender and the cheese lightly browned.


Once cooled for a couple of minutes, transfer this treasure to a cutting board and cut into slices. Enjoy!


Happy French Rustic Tomato Tart Baking!

This post has been linked to...

Mommy's Kitchen for Pot Luck Sunday

Tuesday, September 14, 2010

Oatmeal Toffee Bars Sprinkled with Chocolate Chips


I have many passions in life.  One being my family and friends (love you guys to bits and pieces!!!). Another being around or in beautiful surroundings (like my Mom's garden or a beautiful table cloth or driving through the South of France in my Aunt's little happy car with fun dancey music playing).  And of course one of my BIGGEST passions in life is baking and cooking (which you all know very well).  Yet another passion in my life is paper crafting.  Yes, I adore making cards, scrapbook pages (thanks to my dear friend Kylah for encouraging me and showing me the way) and 3D items too.  I have been able to really feed my passion of paper-crafting by becoming a Stampin' Up! Demonstrator as of 8 years ago.

Part of my passion of being a SU! Demo allows me to have a group of girls come over to my house once a month and have an evening of creativity and fun.  Every month I carefully choose at least 2 (sometimes 3 if I am feeling really inspired) projects for everyone to make. Above you will see one of the projects we made last month.  A great project to make for not only are owls part of the focal point of the mini cards (I also have a special little passion for owls) but also we made a little match-book to hold the hand-made cards.  A nice gift or way to present a card to someone special. 


 Along with the materials and guidance of the projects I like to bake a little something special to share with everyone.  Any excuse for me to bake I jump upon!  Last month I made these lovely little Oatmeal Toffee Bars (which I sprinkled with chocolate chips because chocolate usually makes everyone happy).  Super YUM and a very happy success of a recipe.  Full of flavor, easy to make and a smile is sure to come across your face one you bite into one of these bars.  What more could you ask for!


Oatmeal Toffee Bars Sprinkled with Chocolate Chips
(recipe has been adapted from TK member, Karly )

Ingredients:


1 cup butter, softened

1 cup brown sugar, packed

2 eggs

1 tsp vanilla extract

1 1/2 cup flour

1 tsp baking soda

1/2 tsp ground cinnamon

1/2 tsp salt

3 cups oatmeal, quick cooking or regular rolled oats

1 cup Health Bar Bits

1/2 cup chocolate chips

Directions:

1. Heat oven to 350 degrees F.  Grease 9x13 baking pan.

2. Beat butter and brown sugar in a large bowl until well blended and nice and fluffy.  Add in eggs and vanilla extract.

3. In a medium bowl stir together flour, baking soda, cinnamon and salt....


  ....Gradually add flour mixture to the butter mixture.   Mix well all together.

4. Stir in toffee bits and oatmeal - batter will be stiff....


5. Spread batter into prepared pan.  Sprinkle with chocolate chips....


6. Bake for 25 minutes until lightly browned or until tooth pick inserted in the center comes out clean....


  Cool in pan and then cut into squares.  Serve with happiness!


Happy Oatmeal Toffee Bars Sprinkled with Chocolate Chips Baking!


Saturday, September 11, 2010

Banana Creamy Dreamy Pudding


I feel like ever since I blogged  my "21 Weeks and Counting" post I have continued on with the theme of bananas - of course it didn't help that the day after I made that post a friend of mine dropped off three gorgeous BIG bunches of bananas for me to bake with and for the rest of The Fam to eat for snacks.

First thing I did was give my beloved Mommy a bunch (she LOVES bananas) and then I got down to business and started looking up new and exciting banana recipes.  I discovered two great recipes....
Not Yo'Mama's Banana Pudding - which I re-named,  Banana Creamy Dreamy Pudding - and Banana Cupcakes with PB Frosting (I will be sharing this recipe soon!).

I found my Banana Creamy Dreamy Pudding recipe from Mommy's Kitchen - her blog always makes me so happy to visit! And guess what!?! - Tina, from Mommy's Kitchen has a whole section of recipes that she has made from Paula Deen!!!! - no wonder I love her blog so much! ;-)  That being said this recipe originally comes from my Queen, Paula Deen but was offered to me on Mommy's Kitchen.

AND this recipe is super easy to make!  Great recipe to involve kiddos in to make and assemble.

Here we go....


Banana Creamy Dreamy Pudding

Ingredients:


2 bags Pepperidge Farm Chessman cookies (Lorna Doon cookies would be great too)

3-4 Bananas, thickly sliced

2 cups Milk

1 (1.5 oz) box Vanilla Pudding (instant)

1 (8 oz) package Cream Cheese

1 (14 oz) can Sweetened Condensed Milk

1 (12 oz) container Whipped Topping, thawed (or equal amounts of whipped sweetened whip cream)

Directions:

1. Line a 9x13 dish with 1 bag of cookies.....


....and then layer with sliced bananas....


2. In a bowl combine milk and pudding.  Beat well until thick, scraping down bowl at least once to make sure all of the pudding mix is completely incorporated.  Place in another bowl and set aside.

3.  In the same bowl that you made the pudding, combine cream cheese and sweetened condensed milk.....


.....Beat until smooth.  Scrap down bowl occasionally.

4. Once cream cheese and sweetened condensed milk is nice and smooth, fold in whipped topping/cream...


...and then add in pudding....


....combine as much as you wish.  I mixed mine until about all of the yummy ingredients were about 90% incorporated.  I like a little variation in my pudding mixture for this dessert.

5. Pour this lovely creaminess over the layers of cookies and bananas....


....gently smooth over bananas...


....and then layer the 2nd bag of cookies over the pudding/creamy yumminess...


Look at this lovely yumminess!!!....


Refrigerate until ready to serve. 


Happy Banana Creamy Dreamy Pudding Making!

LinkWithin

Related Posts with Thumbnails

ShareThis