Image Map
Showing posts with label Fall. Show all posts

Monday, October 5, 2015

Baked Apples for SRC

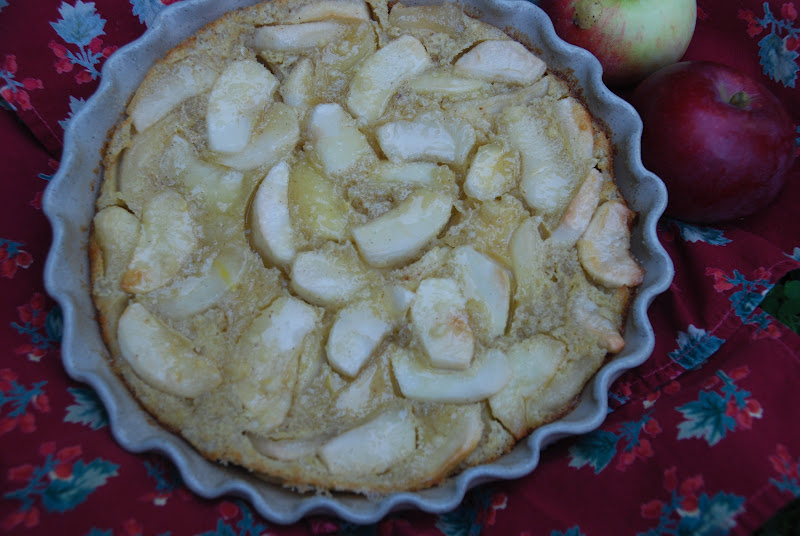
Apples filled with dried fruit, chopped walnuts, brown sugar and cinnamon, cooked all together to make the perfect Fall time snack or dessert. Cooked in the microwave always for a quick and delicious treat anytime of the day. 


Cool air with beautiful Fall colors in the trees has gently settled into South-Western NH.  With this change in weather I have found myself quickly becoming more drawn to all the flavors that I associate with the Fall such as pumpkins and apples.  Pies, cakes and bars have been rolling out of my oven at lightening speed.  I blame most of it on the vast amount of gorgeous apples that this Fall season has provided. The apples that are dropping off of the trees this year are big, beautiful and tasty.   The unlimited supply of apples has given me the extra push to produce as many baked confections that I can find which calls for apples.  


Baked Apples is a recipe that fell quickly into my "all things baked with apples" category.  Thus, as I was browsing through Lori's Culinary Creations, my Secret Recipe Club assignment for this month,  I quickly picked Lori's recipe for Baked Apples.  Believe it or not it was my very first time making a recipe for baked apples.  I am delighted to say that my first try at baked apples was perfect!  I love the recipe I discovered from Lori!  It was simple, quick and delicious.  

  
Lori's recipe calls for Jonagold or Braeburn apples - I had Cortland apples on hand so I used them knowing that Cortlands bake up nicely and I wasn't disappointed.  I then filled each 1/2 of prepared apple with a mixture of brown sugar, cinnamon, chopped nuts and some dried fruit and then covered the apples securely with plastic wrap and popped the pan in to the microwave.  I wasn't quite sure how the baked apples would come out due to being "baked" in the microwave.  I had nothing to fear.  4 minutes cooked in microwave and the filled apples came out to perfection.  They were a tender texture and the filling melted beautifully into the apples.  


 I have no doubt that all of Lori's recipes on Lori's Kitchen Creations are just as good as this recipe for Baked Apples.  I was amazed and quite impressed with the variety and amount of recipes she has showcased on the her blog.  I am looking forward to baking up a batch of Pineapple Cornbread - I love all things made with cornmeal.  I also want to make a HUGE batch of her Creamy Cilantro Ranch Dressing - I am a die hard lover of cilantro. 

     Baked Apples 

Ingredients:
2 large apples - Jonagold, Braeburn or Cortland, cored and cut in 1/2
2 TBSP dried cranberries
2 TBSP raisins
2 TBSP chopped walnuts
2 TBSP brown sugar, lightly packed
1 tsp ground cinnamon
1-2 TBSP butter

Directions:
In a small bowl combine all together dried fruit, nuts, brown sugar and cinnamon.  Lightly spray a microwave proof baking dish that will contain your apples.  Place apples inside baking dish cut side up.  

Fill with mixture and then evenly dot each filled apple with butter.  Cover dish securely with plastic wrap on all sides except one allowing for one corner to vent.  

Cook in microwave for 4 minutes.  Allow to cool for 2 minutes before serving.  A scoop of ice cream is lovely on top of each baked apple if you wish! 

Enjoy! 


                            Happy Baked Apple Making!


Saturday, March 14, 2015

Apple Pear Pie with A Crumble Topping for PIE DAY!


Hip! Hip! Hooray! Today is Pi(e) Day!!! All things PIE are celebrated today as the date 3.14 marks the beginning of a very famous number called "Pi" (3.141592653).  Bakers every where rejoice as this day of "Pi" gives us all the freedom to create, master and enjoy the delicious existence of PIE.  A group of such bakers (including myself) have gotten together to gather a collection of a variety of recipes which feature and honor PIE for all of you out there that also LOVE and ADORE pie just like we do! A HUGE bundle of gratitude goes out to Terry of Love and Confections for organizing this fantastic group of bakers to come together with all things PIE for this fabulous holiday of all holidays. You are fantastic Terry for orchestrating all of us! Please be sure to scroll to the bottom of this post to see the list of links to all the delicious pies our group has baked up for this very special, special day.


  I choose to bake an Apple Pear Pie with Crumble Topping.  Apples and pears make up the filling along with just enough sugar to sweeten the fruit along with sprinkling of cinnamon and then topped with a tender crumble of butter, sugar and flour. A master piece of a pie.


This particular pie was developed from a vision of mine for the perfect pie.  I wanted it to have a delicate and flaky crust which was then filled with sweet yet slightly tart fruits of apples and pears and then crowned with a lovely tender and crumbly topping.  After combining 3 different recipes together I was able to create my dream of a pie.  Life is good.  Or even better, "life is Pie-LICIOUS"! :-) 


I used Ina Garten's Perfect Pie Crust recipe for my pie crust (which is flaky, delicious and fool proof) and then I used the two recipes below to complete my lovely pie of all pies. I was quite delighted with the end result.

Apple Pear Pie with Crumble Topping

Filling Ingredients
(slightly adapted from Taste of Home)
3-4 large baking apples - peeled, cored and sliced
3 large ripe pears - peeled, cored and sliced
1 tsp fresh lemon juice
1 cup sugar
1/4 cup flour
1 tsp cinnamon

Crumble Topping Ingredients - 
(slightly adapted from Bourbon and Boots)
3/4 cup flour
3/4 cup sugar
1/2 cup butter, cut into cubes

Prepare a single pie crust using a recipe of your choice or even a store-brought crust is fine too.   Line a pie plate with said crust and place in refrigerator while you prepare the filling and topping.

Preheat oven to 375 degrees F.

In a large bowl combine all of the filling ingredients - gently toss together to incorporate fully. Set filling mixture aside as you prepare the crumble topping. 

In a medium bowl combine flour and sugar.  Using 2 knives or a pastry cutter, cut butter cubes into the flour and sugar until the butter is pea sized and uniform.  

Pour filling mixture into prepared pie shell and then carefully spoon topping over the fruit evenly.  Place pie onto a foil lined cookie sheet and bake for 50-60 minutes or until pie is golden brown and filling is bubbly.  If the pie crust edge looks like it is getting too dark, cover the edge with a piece of tin foil.

Cool pie for at least 2 hours before slicing and serving.  A scoop of vanilla ice cream always goes well with this pie. 


Happy Apple Pear Pie with Crumble Topping Baking!
Welcome to Pi(e) Day hosted by Terri from Love and Confections! Pi Day is celebrated every March 14 by math fans around the world - and also bakers and pastry chefs. Pi is an non-repeating, infinite number represented by the Greek letter π, and used to represent the ratio of the circumference of a circle to its diameter. Today, March 14, 2015, is an extra special Pi Day, because at 9:26:53 AM it creates the "Pi Moment of the Century". The first ten digits of Pi are 3.141592653 (3/14/15, 9:26 AM and 53 seconds). This exact date and time happens once every hundred years - a once in a lifetime moment for most of us. How cool is that? Today, 20 Food Bloggers have gathered and want to celebrate the fun of Pi by creating their own sweet and savory pies to share with you. Hope you have a delicious day!


Enjoy a slice from the Pi(e) Day Bloggers:

Wednesday, November 27, 2013

The Cake Slice Baker's November Cake ~ Applesauce Spice Cake

 
 Hello and Happy November!!
 
I have recently joined a baking group called The Cake Slice Baker's and I couldn't be more excited!  Not only have I been able to meet a group of lovely bakers but they are also extremely talented and oh so, very friendly.  For the next year the Cake Slice Baker's will be baking from a cookbook called, Great Cakes by Carole Walter.   Each month we will choose a recipe from this book based on a poll and present it on-line on or after the 20th of each month.  This month everyone baked an Applesauce Spice Cake from Great Cakes.  I was delighted with this recipe as the cake was delicious!


I found this cake to be full of warm Fall flavors.  Lots of good spices, chopped fruit and nuts all surrounded by a tender and moist cake.  And then because I just love a good icing I whipped up the suggested topping of a Brown Sugar Glaze and drizzled it over the cake.  Perfection! 


I did change a couple of things slightly from the original recipe.  Unfortunately, I did not have any nuts in my pantry so instead I added raisins and dried cranberries which I plumped up in some boiling water for a couple of minutes. I also omitted the allspice that the recipe called for as I was in the  mood for just nutmeg and cinnamon. 
 
  The steps that were required to create this cake were put together with great thought and care. Such as sifting the dry ingredients a couple of times before adding them into the wet ingredients.  I also found it nice to add the granulated and brown sugar by the tablespoon mixing well in between each addition instead of all at once.
 
A perfect Fall cake to share a gatherings or to enjoy simply with a cup of delicious hot tea.


Applesauce Spice Cake
 
Cake Ingredients:
 
2 1/4 cups sifted all-purpose flour
1 tsp baking soda
1/4 tsp salt
1 1/2 tsp ground cinnamon
1 tsp ground allspice
1 tsp ground nutmeg
3/4 cup pecans, lightly toasted and chopped
1/3 cup (2/3 stick) butter
1 tsp grated lemon rind
1/3 cup vegetable shortening
3/4 cup granulated sugar
2/3 cup light brown sugar, lightly packed
2 large eggs
1 medium-sized tart greening or Granny Smith apple, peeled and chopped medium small (about 2/3 cup)
1 tsp vanilla extract
1 cup sweetened bottled applesauce
 
Brown Sugar Glaze Ingredients:
 
3 Tbsp butter
3 Tbsp light brown sugar
3 Tbsp heavy cream
3/4 cup sifted powdered sugar
1/2 tsp vanilla extract
 
Directions:
 
1. Preheat oven to 350 degrees.  Butter and flour a fluted or bundt pan.
 
2. Sift together flour, baking soda, salt and spices in a triple sifter a couple of times.  Stir in chopped nuts and set aside.
 
3. In a large bowl of  mixer cream together butter and lemon rind. Beat at medium-high speed for 1 minute and then add in shortening.  Mix for an additional minute.
 
4.  Add in granulated sugar, 1 tablespoon at a time.  This will take 3-4 minutes to complete.  Next add in brown sugar the same way and scrape sides of the bowl occasionally.
 
5. With the mixer on medium-low speed add in eggs one at a time in 1 minute intervals.  Add in fresh chopped apple (and dried fruit if you wish) along with vanilla extract.
 
6. Keeping the mixer on low speed add in flour mixture alternately with applesauce - starting and ending with the flour mixture.  Only beat batter until flour is just incorporated after each addition.  Scrape sides of bowl occasionally.
 
7. Pour batter into prepared pan and smooth the top.  Bake in the center of the oven for 50-60 minutes or until cake is golden brown and toothpick inserted into the center comes out dry.
 
8.  Cool cake for 10-15 mintues before inverting onto a serving plate.  While cake cools prepare glaze. 
 
9.  In a medium size sauce pan melt together brown sugar and butter over low heat.  Stir in heavy cream.  Cook until mixture comes to a gentle boil and then allow to simmer for 1-2 minutes.  Remove from heat to add in sifted powdered sugar - whisking until smooth.  Add in vanilla extract.  If the glaze is too thick add in more heavy cream, 1 Tbsp at a time.  Pour glaze over warm cake. 
 
~Store cake at room temperature under a glass dome or in an airtight container for up to 2 days.  If you store in refrigerator cake will store up to 10 days.  Cake should be wrapped tightly and unglazed.
 
Enjoy!  And be sure to enjoy the links below for all the beautiful Applesauce Spice Cakes that my fellow Cake Slice Baker's made too!


Happy Applesauce Spice Cake Baking!


Monday, October 29, 2012

Appledoodle Cookies (October's SRC pick)

Goodness I am so excited to share this month's recipe for Secret Recipe Club! I was granted the honor of being assigned the blog called, Fried Ice and Donut Holes for the month of October (such an fabulous name for a blog!).  It truly was an honor and so much fun to browse through this blog.  Please do hop on over to Fried Ice and Donut Holes and check out all the scrumptious recipes.  You might want to take a peek at the Blueberry Biscuit Cobbler along with the Buffalo Chicken Shepard's Pie and then be sure to check out the Cashew Chicken recipe too! So many wonderful recipes.  And yes of course I choose to pick a recipe that I could bake.  You know the kind the has flour, sugar and butter in it.  Yes, you know me well!  Always baking over here! :-)


  I have so many apples in my house that have to used before they get rotten so when I came upon the recipe for Appledoodles I jumped on it fast! I could make cookies and the cookies would be made with apples! Granted it was only two apples from my 20+ but still it was a win win situation as the cookies came out fabulous and I had two less apples in my pile of "must-use-soon-apples" before they turn mushy and rotten. 
 
I loved everything about these cookies.  The fact that they are a spin off of Snickerdoodle cookies caught my eye right away as I just adore Snickerdoodles!  Adding in chopped apples to a favorite cookie was brilliant.  The cinnamon sugar rolled cookies came alive with all things Fall and comforting when the apples were baked into these little gems.  And since I had some peanut butter morsels just itching to be paired with the apples (because apples and peanut butter go together in my world) I threw in a couple handfuls to the cookie batter.  Oh my, what delicious happiness found in a cookie!


Appledoodle Cookies
 
Cookie dough
 
1 stick unsalted butter, at room temperature
2/3 cup brown sugar
2/3 cup granulated sugar
2 eggs
2 cups flour
2 tablespoons cornstarch
1 teaspoon baking soda
1/2 teaspoon salt
1/8 teaspoon nutmeg (optional)
1-2 apples, peeled, cored and chopped
1 cup peanut butter morsels (my addition)
 
Cinnamon Sugar Mixture
 
1/2 cup granulated sugar
3 tablespoons cinnamon
 
Directions
 
1. In a small bowl combine 1/2 cup granulated sugar and 3 tablespoons cinnamon.  Set aside.
 
2. Preheat oven to 350 degrees F.  In a large bowl cream together butter and sugars until light and fluffy - about 3-4 minutes. Add in eggs and beat to combine well.
 
3. In a medium bowl combine flour, cornstarch, baking soda, salt and nutmeg (if you wish).  Add to the wet mixture. 
 
4. Gently fold in chopped apples and peanut butter morsels.
 
 
5. Form balls of the dough and roll carefully to coat in the cinnamon sugar mixture. Place sugar rolled cookies on parchment lined cookie sheets and bake for 14 minutes turning cookie sheet half way through baking time. Cookies will be golden on the edges and blond in the middle.  Allow cookies to cool on sheets before removing.  Cookies are stored best in an airtight container and will remain soft for about 3 days.  Yum! 
 
 
Enjoy!


Thursday, October 4, 2012

Homemade Caramel Sauce ( Week #2 of 12 Weeks of Christmas Treats)

 
Chocolate sauce or caramel sauce....which one do you prefer? I kind of lean towards both. Especially when they are homemade! Chocolate sauce is perfect over good vanilla ice cream and caramel goes perfect over anything apple.  And well, geez both of them go perfect with just a spoon! 


Since I have already tried my hand at making homemade chocolate sauce I couldn't wait to do the same with homemade caramel sauce.  I seized the opportunity recently keeping in mind that caramel sauce would be a lovely present for friends and family this coming holiday season along side a jar of chocolate sauce
 
 
With the encouragement of my participation in the 12 Weeks of Christmas Treats group (thank you so much Brenda for hosting this group!) I present to you today a super easy and extremely delicious recipe for HOMEMADE Caramel Sauce.  Hooray! Amen. YUM!
 
The recipe below will fill one good sized jar.  Double the recipe if you wish to make multiple jars.
 
 
Homemade Caramel Sauce
(recipe slightly altered from Countertop Confessions)
 
Ingredients:
 
1 stick salted butter
1 cup packed brown sugar
1/4 cup heavy cream (the original recipe calls for milk)
2 Tbsp light corn syrup (the original recipe does not call for corn syrup - I added it to help with keeping the sugar and butter from separating)
1 tsp vanilla
 
Directions:
 
1. Melt butter in a medium saucepan.  Add in brown sugar once butter has fully melted.  Stir constantly as you bring the melted butter and sugar to a boil.  Allow mixture to boil for 2 minutes or until sugar has dissolved completely.
 
2. Stirring constantly, add in milk.  Mixture will snap and pop...not to worry this is normal.  Stir in corn syrup.  Allow sauce to return to a boil and do so for 2 more minutes. 
 
 
3. Remove pan from heat.  Add in vanilla extract.  Stir well to combine.  Sauce will be smooth and deliciously beautiful.
 
 
4. Cool for 30 minutes before pouring into a pretty jar and wrapping it with a ribbon.


Happy Homemade Caramel Sauce Making!
 
 To enjoy the other talented bloggers of the 12 Weeks of Christmas Treats see links below.


Monday, September 24, 2012

Apple Clafoutis for September SRC


Clafoutis.  Such a beautiful word that just rolls off your tongue.  Try it.  Pronounced as, Cla-Fou-Tee.  See wasn't that wonderful to say!?!

Just as wonderful as saying clafoutis I would like to introduce you to a very special food bog called, My Judy the FoodieMy Judy the Foodie was my assigned blog for the month of September for the Secret Recipe Club.  Not only is this food blog packed with amazing recipes that make your mouth water and drool but more importantly the love, dedication and happiness that has given life to this blog is just beautiful.  Shari, daughter to Judy (as in Judy of My Judy the Foodie), created this blog in an effort to teach herself how to be in the kitchen with confidence and ease along with honoring her mom who was a beautiful master in the kitchen. In reading through Shari's blog it became clear to me that her mother surrounded her herself by all things beautiful and meaningful including food.  And through her kitchen magic Judy created happiness and special moments all around her that were deeply treasured by all.  Shari has done a beautiful job through her own words (and video's!) exploring her mother's recipes and then sharing them with all of us lucky people.   I was honored to have been part of Judy and Shari's world for this past month as I soaked up all the deliciousness and kitchen passion through my SRC assignment.  Sending you hugs Shari!  You are an amazing woman!  Truly amazing. :-)


Apple Clafoutis was my pick from all the delicious recipes from My Judy the Foodie which I will share with you today.  I could not have been happier with my choice!  Clafoutis hold a special place in my heart as my family in France often make such a dessert.  Instead of using apples they use FRESH cherries, apricots or plums from their fruit trees.  Delicious!  The simplicity of mixing up a clafoutis is lovely.  Your fruit of choice is surrounded by simple ingredients such as eggs, milk, flour,sugar and melted butter which can all be mixed by hand.  Grab those apples you have in abundance right now and make your heart and palate sing with joy over this dessert.  And then invite me over for a piece - I can never have enough clafoutis! :-)


Apple Clafoutis
(recipe from My Judy the Foodie)
 
Batter Ingredients:
3 eggs
2/3 cup sugar
2/3 cup flour
1 cup milk
4 Tbsp butter, melted
1 tsp vanilla extract
1 tsp ground cinnamon (my addition as I can never go without adding cinnamon to an apple recipe)
 
Apple ingredients:
1 Tbsp butter
4 large apples, peeled, cored and cut into 1/2" slices
1/2 cup sugar
3 Tbsp rum (which both Shari and I omitted)


Directions:
 
1. Prepare your apples by melting 1 Tbsp butter and sugar in a large frying pan. Mix melted butter and sugar together to combine.  Peel, core and slice apples and then place into pan with melted butter and sugar.  Cook apples for 10 minutes, occasionally stirring gently.
 
2. Prepare batter while apples are cooking.  In a large bowl whisk together all batter ingredients.  Your batter will have the appearance similar to a pancake batter. 
 
3. Grease and dust with sugar a pie plate.  Add in 2 cups of batter to the prepared pie plate.  Gently add in cooked apples.  Leave the syrup of the apples behind for later use. Pour remaining batter over apples.
 
4. Bake your clafoutis in a 350 degrees oven for 30-35 minutes.  The clafoutis will be golden brown and set in the center when done.  The center will be just a little bit jiggly but that's what a clafoutis will do when baked.
 
5. Pour remaining apple syrup over your clafoutis when you take it out of the oven.
 
Serve warm or cold...either way is delicious!


Happy Apple Clafoutis Baking!


Sunday, November 13, 2011

Apple Pie Cake

I actually have an APPLE recipe for you today instead of a PUMPKIN recipe! I feel like all I do is bake with pumpkin these days.  Which is not a bad thing at all believe me (I ADORE pumpkin!!) - but I like to provide a little variety in my baking to keep my friends, family and blog readers happy. :-)


When I came across this recipe for an Apple Pie Cake my eyes grew wide, my heart started to beat faster and bounced in my chair with happiness.  An Apple Pie Cake sounded AMAZING!  Boy, oh boy was it ever!  So yummy.  So easy to make. AND it only requires 6 ingredients to make!!!! Yup, only SIX

You will need a 9 inch springform pan to make this apple-lious treat. A lovely mixture of brown sugar, cinnamon, flour and (COLD) butter form the bottom, sides and top of this pie/cake.  You will first gently press a large portion of the brown sugar/flour mixture on the bottom and sides of the springform pan, fill the inside with all your prepared tart apples and then top apples with the remaining brown sugar/flour mixture.  Which becomes the top of the pie/cake. It all comes together like magic as you are using such simple ingredients to make a wonderfully unique and delicious dessert.  So grab some apples, your springform pan, a couple of ingredients from your pantry and fridge and preheat your oven to create a perfect Fall dessert.   Then invite me over for a piece - I will bring freshly sweetened whipped cream to go on top! ;-)


Apple Pie Cake
(from the famous Martha Stewart)

Ingredients:

2 cups flour
1 cup packed light-brown sugar
2 tsp ground cinnamon
2 sticks cold unsalted butter, cut into pieces
about 12 tart apples - such as Granny Smith
2 Tbsp lemon juice

Directions:

1. In a large bowl, combine flour, brown sugar and 1 tsp cinnamon. With a pastry cutter add in butter pieces and cut into flour mixture until small pea size pieces remain. 


2. Press 2/3 of the brown sugar/flour/butter mixture on the bottom and up 1 inch of the sides of a 9 inch springform pan. Set pan aside.


3. Preheat oven to 350 degrees F.  Prepare apples by peeling and then slicing into thin slices and placing in a large bowl.  Sprinkle apples with lemon juice so that they do not turn brown and then sprinkle with remaining 1 tsp of ground cinnamon.

4. Place sliced apples into the shell of your prepared springform pan, pressing down gently as you pack them in.  If the apples mound over the edge of your pan that is ok - the more the better!  Sprinkle remaining brown sugar/flour/butter mixture over apples.

5. Line a cookie sheet with tin foil and then place prepared dessert on top before popping the whole thing into the oven.   Bake for 1 hour and 15 minutes or until golden brown on top. When pie/cake come out of the oven carefully run a knife around the edge of the pan and then allow to cool so that the magical yummy treat can set.

Serve at room temperature if you wish!


Happy Apple Pie Cake Baking!

Saturday, November 5, 2011

Pumpkies (the cutest name ever)

I mean seriously doesn't it make you want to say, "ahhh" when you hear the word pumpkie?  I just love that word! And I love what a pumpkie actually is! Can you guess what it is? It is not a cookie.  Not cake. Not even a mini pie.  It's a.....brownie!  Yes, a pumpkin brownie! A lovely, sweet and easy to make pumpkin brownie.  A Pumpkie.  Go ahead, you can say it - it will make you smile. :-)


Want the recipe? I know you do!

Pumpkies
(recipe from Mother Thyme - I so LOVE Jennifer's blog)

Ingredients:

1/3 cup butter, softened
1 cup sugar
1 egg
1/2 cup pumpkin puree
3/4 cup flour
1 tsp pumpkin pie spice
1/2 tsp cinnamon
1/4 tsp salt

Directions:

1. Preheat oven to 350 degrees F. Grease an 8x8 baking pan - set aside.

2. Beat butter until light and fluffy - about 2-3 minutes.  Add in sugar, egg and pumpkin puree.  Mix all together until well combined.

3. Add in flour, spices and salt to your pumpkin mixture.  Mix all together until well combined.

4. Pour batter into prepared pan and then pop into preheated oven for 30-35 minutes.  Cool as much as you wish and serve.

*I served mine slightly warm and wished that I had some freshly whipped cream to dollop on top as I think that would have been super yummy...next time I will do so!


Happy Pumpkies Baking!


Monday, October 31, 2011

It Is Secret Recipe Club Time!

Recently I joined a fun cooking group online called, The Secret Recipe Club.  Oh. My. Goodness what fun! I was assigned a LOVELY blog and from that blog I got to choose a recipe to make and then share with all of you.  But I couldn't reveal the blog or the recipe until today!  So without any further waiting my secret recipe for today is, Mini Pumpkin Muffins....


.... from the wonderful blog, Everyday Sisters. :-)

Not only did I enjoy this recipe (as I am sure you guys will too) but I fell head over heels in love with this blog!  Four (yes, FOUR...two of which are identical twins and all four of which are just lovely inside and out -  I can tell by their sweet smiles.) sisters have created and contribute to Everyday Sisters. All of them are just lovely - I feel like I know them personally now that I have been following them for the past month.  I felt honored to get to know them via their blog.  I love the variety of recipes that they offer such as Bistro Style Pasta Neapolitano (super yum looking and simple to throw together), White Zinfandel Sangria (one of my all time favorite kinds of drinks...the recipe lots so GOOD!) and Blueberry Cheesecake (which won an award!).  Yup, I did a lot of drooling as I looked through their blog. So many yummy recipes!! :-)

 
I loved these Mini Pumpkin Muffins! These little gems only required 5 ingredients - simple, yummy and fun.  Nothing better than that. Amen! And because they were so yummy and simple to make I made a batch to send to my oldest daughter's Halloween party at school today. I think all the kiddos will love them!

Mini Pumpkin Muffins
(recipe from Everyday Sisters)


Ingredients:
1 box yellow cake mix
1 can (15 oz.) pumpkin (NOT pie filling)
3 eggs
1/3 cup oil (I used canola)
sunflower seeds - optional - (I used chocolate covered sunflower seeds as that is what I had on hand... which worked out pretty well!)
Directions:
1. Preheat oven to 350 degrees F. Grease mini muffin tins or line with cupcake liners.
2. In a large bowl combine all ingredients except for sunflower seeds. Mix until well combined. 
3. Stir into batter sunflower seeds or you can wait until muffin batter has been scooped into tins.
4. Scoop batter into muffin tins.  I did so with my small scoop from Pampered Chef.

5. Bake for 11-13 minutes.  Cool for a couple of minutes in pan and then remove to serve and enjoy.


YUM!

A special thank you to Ellen, Nanci, Karen and Susan from Everyday Sisters for being part of the Secret Recipe Club so that I could have you as my first Secret Recipe Club blog.  Also, I'd like to thank Amanda who created this cooking club and Tami for hostessing my group.  I can't wait to find out which blog I get for the month of November!

Happy Mini Pumpkin Muffin Baking!

LinkWithin

Related Posts with Thumbnails

ShareThis