Image Map
Showing posts with label bars. Show all posts

Thursday, August 6, 2015

FIVE Ingredient Blueberry Brownies


Blueberries.
Chocolate.
Both are my favorites.  Combined together they make magic.  Pure, delicious magic!

And magically, after years of trying to replicate this very recipe I was given the secret to it's success.  Only 5 simple ingredients create these brownies.  FIVE.  An egg, some oil, water, Ghirardelli brownie mix (because that's really the best kind brownie mix around) and blueberries.

I jumped for joy with this lovely, lovely recipe finally in my hands.  I felt as though I had won the lottery, found a pot of gold at the end of the rainbow and the biggest treasure chest of my dreams were all given to me at once as I walked away with this recipe in my hands.  My prayers had been answered.  Blueberry Brownies could now be accomplished with perfection.


I am delighted to pass on this recipe to all of you chocolate loving, blueberry loving friends.  I honestly think it will change your world in a decadent chocolate, rich texture, blueberry packed loveliness kind of way.

Please pay it forward and whip up a batch of these brownies as quickly as possible.  Share them with as many people as you can.  It is crucial that we spread the love and deliciousness of Blueberry Brownies with everyone in the world.  I really think that world peace can now be accomplished with Blueberry Brownies at our side.  Please help me with this cause.


FIVE Ingredient Blueberry Brownies 

Ingredients:
1 box Ghirardelli brownie mix
1 egg
1/3 cup oil
1/3 cup water
1 1/2 cups blueberries, fresh or frozen

Directions:
Preheat oven to 325 degrees F.  Lightly grease an 8x8 pan and then line with parchment paper - set aside.

In a large bowl combine brownie mix, oil, water and egg.  Mix until smooth.  Gently fold in blueberries.

Pour batter evenly into prepared pan and bake for 35-40 minutes or until toothpick inserted into center comes out clean.  Cool, cut and serve and spread the love!  

Happy FIVE Ingredient Blueberry Brownie Baking!

Wednesday, March 25, 2015

Berry Cheesecake Bars


Whom ever invented cheesecake is simply brilliant! Completely and honestly brilliant.  There are so many wonderful flavors and special additions that you can develop into a cheesecake.  It can be sweet or a savory.  No matter what the flavor it is always decadent and delicious. And a cheesecake is the perfect kind of cake to celebrate a special occasion - especially a 15th wedding anniversary! 


 Today we celebrate the beautiful Camilla Mann of the food blog, Culinary Adventures with Camilla,  and her marriage to her beloved hubby of 15 blissful years with all things CHEESECAKE.  26 of us passionate food bloggers have gotten together and brain-stormed, created and baked to our little hearts content all things CHEESECAKE.  Sweet ones, salty ones, mini and large are all being featured together in unison to honor and rejoice over the Mann's 15 years of marriage.  The Mann's really like cheesecake.  Can you blame them?! I can't. 


I made a batch of Berry Cheesecake Bars just for today's event. I love the taste of berries and cheesecake served together so I was delighted to find this recipe which bakes berries right into the cheesecake.   Instead of making a cheesecake in the traditional form using a spring form pan, this recipe is created into bars using a 9x13 pan.   The crust is made out of a delicious mixture of flour, sugar, rolled oats and butter.  Simple ingredients coming together to make a wonderful foundation for these bars.  The filling only requires 2, 8oz. blocks of cream cheese compared to the normal 3-4 blocks in a spring form size cake.  And you can choose to add in lemon juice to provide a fresh tartness to the bars or opt out of such an addition. Completely up to you!  The berries that you use in this recipe can be fresh or frozen - it all depends on what is available to you and your preference.


I present to you a wonderful recipe for cheesecake bars packed with berries and full of delicious-ness.  Happy 15th Camilla and Jake!  Wishing you both many, many more years to come of your beautiful marriage along side an abundance of CHEESECAKES!! :-)

Berry Cheesecake Bars 
      (recipe from Beauty and Bedlam)

Crust ingredients:
1 1/4 cup all purpose flour
1 cup sugar
1 cup rolled oats
3/4 tsp baking powder
2/3 cup salted butter, melted 

Filling ingredients:
(2) 8oz. blocks cream cheese, softened
2/3 cup sugar
2 Tbsp all purpose flour  
4 eggs
1 tsp vanilla extract 
2 TBSP fresh lemon juice - optional
2-4 cups mixed berries, fresh or frozen


Preheat oven to 375.  Grease a 9x13 pan and set aside.  Prepare crust - in a large bowl combine crust ingredients -  flour, sugar, rolled oats and baking powder.  Mix well all together.  Pour in melted butter and carefully stir all together.  

Gently press crust mixture evenly into prepared pan with a plastic baggie over your hand (the baggie prevents the mixture from sticking to your hands).  Bake crust for about 15 minutes or until crust is golden brown.  Cool crust for 30 minutes.  Reduce oven heat to 325.

Sprinkle berries evenly over cooled crust.  Make filling by beating softened cream cheese until light and creamy in a large bowl.  Add in sugar and 2 Tbsp flour. Beat well all together. 

Add in eggs, one at a time - beating well with each addition.  Add in vanilla extract and lemon juice.  Once all has been mixed well together pour filling mixture over berry layer and place into 325 oven.  Bake for 40-50 minutes or until knife inserted into middle comes out clean and center feels firm to the touch.  

Cool cheesecake for 2 hours before placing in refrigerator to continue to cool for at least 3 more hours.   Cut into bars and serve.  Enjoy!! 


Happy Berry Cheesecake Bars Baking! 


Berry Cheesecake Bars by Baking and Creating with Avril
Cherry Cheesecake Bites by Cookaholic Wife
Chocolate Caramel Cheesecake by Dancing Veggies
Chocolate Cheesecake by My Hobbie Lobbie
Chocolate Topped Peppermint Cheesecake by Amy's Cooking Adventures
Creme Brulee Cheesecake Bars by Tara's Multicultural Table
Easter Basket Mini Cheesecakes by Little Bit of Everything
Everyday Cheesecake by Things I Make (for Dinner)
Irish Cream Cheesecake by A Day in the Life on the Farm
Layered Cinnamon Streusel Cheesecake Cake by Famished Fish, Finicky Shark
Lowfat Blackberry Cheesecake by A Kitchen Hoor's Adventures
Matcha-YuzuCheesecake with a Meyer Lemon GelĂ©e by Culinary Adventures with Camilla
Mini Churro Caramel Cheesecake by Cheese Curd In Paradise
Mini Maple Pecan Cheesecakes by Join Us, Pull up a Chair
Mom's New York Cheesecake by Taste Cook Sip
Mudslide Cheesecake by Sew You Think You Can Cook
{No Bake} Marshmallow Cheesecake by An Affair from the Heart
No-Bake Pumpkin Cheesecake by Angels Homestead
Samoa's cheesecake by Goodie Godmother
Sopapilla Cheesecake Bars by The Savvy Kitchen
Sopapilla Puff Pastry Cheesecake by Pink Cake Plate
Skinny Vanilla Bean Cheesecake by Renee's Kitchen Adventures
Twix Cheesecake Brownie Torte by Making Memories With Your Kids

Monday, February 24, 2014

Caramel Nutella Crumb Bars


Nutella.  Caramel.  Tender crust with a crumbly topping.  Have I got your attention?  How about putting all THREE of these together to make one lovely decadent bar?  I say YES! AND completely brrrrrrilliant.  That's what you get when you stop over at the Fearless Homemaker's blog by the adorable, Amy.  You can find amazing recipes such as these Caramel Nutella Crumb Bars that feed your visual taste buds to the highest degree in such a strong way that you have no choice but to grab your apron and dive into your kitchen to whip up such a treat.
 
I have already been a faithful "stalker" to Amy's blog now for quite a while as I discovered her blog through the Secret Recipe Club.  This month I had the complete honor of being assigned to her blog for February's Secret Recipe Club to actually pick a recipe and make it to share with all of you.  What fun!  I wanted to make every single bar, cake, soup and bread recipe on the Fearless Homemaker!  Unfortunately, between working full time, raising two young kiddos and having laundry that really needed to be done I could only make one recipe.  My sweet tooth won over (yet again) and I choose to make the Caramel Nutella Crumb Bars.   Sweet, sweet HEAVEN in a bar I am telling you.  Simple ingredients, quick assembly and delicious outcome.  What could be better?  Nothing.  Absolutely nothing.  So grab your butter, your Nutella and a can of sweetened condensed milk and mix up a batch of these bars ASAP.  It will be well worth it.  And then cruise on over to visit Amy at the Fearless Homemaker to say hi and grab a few more recipes from her fabulous, treasure of a blog!


Caramel Nutella Crumb Bars
(recipe from the Fearless Homemaker)
 
Crust and Topping Ingredients -
 
2 Sticks unsalted butter, at room temperature
1/2 cup granulated sugar
1/4 tsp salt
1 tsp vanilla extract
2 1/2 cups flour
 
Filling Ingredients -
 
4 Tablespoons unsalted butter
1 Tablespoon light corn syrup
1/4 cup brown sugar, packed
1 14oz. can sweetened condensed milk
1/2 cup Nutella
 
Directions -
 
1. Preheat oven to 350 degrees F.  Line a 9x13 baking pan with parchment paper and set aside.
 
2. Cream together 2 sticks of butter,  granulated sugar and salt until light and fluffy. Add in vanilla extract.  Slowly add in 2 1/4 cups flour until dough is smooth and flour is fully incorporated. 
 
3. Press 3/4 dough evenly into the bottom of the prepared pan.  Place into refrigerator while you make the filling and crumb topping of the bars.
 
4.  Add the remaining  1/4 cup of flour to the dough.  The dough will become crumbly and coarse.  Be careful not to over mix the dough at this point. Set crumble topping aside.
 
5. Spread 1/2 cup nutella evenly over chilled crust.  If need be heat nutella slightly to allow for easier spreading.
 
6. To make the filling use a medium size saucepan to combine 4 Tbsp butter, corn syrup, brown sugar and sweetened condensed milk.  Heat saucepan over medium-low heat, whisking occasionally until mixture comes to a simmer.  Now bring mixture to a boil and  whisk constantly for about 10 minutes so that it thickens in texture and darkens in color.  Remove from heat once you have a darkened and thickened sauce and cool for about 6-10 minutes.  Pour caramel sauce over nutella layer and then sprinkle crumble topping over the caramel layer.
 
7.  Bake for 30 minutes or until the filling is a dark caramel color and bubbling lightly.  Cool on a wire rack for at least 15 minutes before cutting into squares.  Share and enjoy! :-)
 
Happy Caramel Nutella Crumb Bars Baking!


Monday, April 29, 2013

Carrot Cake Muffin Bars {for April's SRC}


Do you ever enter into someone's home and feel like you never want to leave?  You know that kind of home that is just so beautiful and welcoming that you just want to wrap all the comfort it gives out around you.  I always feel like this when I go to my mom and dad's house.   This month when I opened up my assigned food blog to Eat, Live, Run from the Secret Recipe Club I immediately felt like I never wanted to leave! Just like I feel when I enter into the happiness, warmth and beauty of my parent's home.  Everything about Jenna's blog is just full of lovliness and delicious-ness.  Her recipes are completely beautiful along with the way she presents and describes them.  And then of course the reality that last Fall Jenna released a novel called, White Jacket Required - which by the way has been on my wish list over at amazon.com - I felt even more compelled to just tuck myself into one of the corners of her kitchen just so that I could soak up ALL the amaziness, knowledge and love of food that she has.   I don't think she would mind, do you?


 Instead of stealing away into Jenna's kitchen I settled for making one of her recipes.  I made her Carrot Cake Muffin Bars.  Deelish!  A bar that has many of the ingredients that are in a carrot cake is a dream come true for me.  Shredded carrots, raisins (my addition), walnuts and then of course oats all come together to make one fantabulous little treat.  You could enjoy this bar at breakfast, lunch, tea or dessert.  Personally I enjoyed nibbles and bites of these bars ALL. DAY. LONG.  Hey, sometimes that is just what you've got to do.  You can't waste a good thing!  But, you can SHARE a good thing right!? Thus I share with you the recipe to Jenna's Carrot Cake Muffin Bars .


Carrot Cake Muffin Bars
              (recipe from Eat, Live, Run )

Ingredients:

3/4 cup brown sugar, packed
1 stick butter, softened
1 egg
1/4 milk
3/4 cup flour
1 tsp cinnamon
1/2 tsp salt
1 tsp baking powder
1 cup oats - old fashioned or quick
1 cup grated carrot (2 medium or 1 large carrot)
1/2 cup chopped walnuts
1/2 cup raisins (my addition)

Directions:

1. Preheat oven to 350 degrees F. Grease a 9x9 square pan and set aside.

2. In a large bowl whisk together dry ingredients of flour, salt, baking powder and oats. Set bowl aside.

3. Cream together butter and brown sugar until light and fluffy.  Add in egg and beat well until smooth.  Add in milk slowly while mixer is on low speed.  Then add in dry ingredients. Mix all together to combine.

4. Add in grated carrots, walnuts and raisins (if you wish).  Mix until just combined. 

5. Pour batter into prepared pan and bake for 25-30 minutes. Edges of the bars will be come away from the sides of the pan and the center will not jiggle if gently touched when done.

Cool to desired temp, cut, serve and enjoy!


Happy Carrot Cake Muffin Bar Baking!

Monday, January 28, 2013

Samoa Blondie Bars (for January's Secret Recipe Club)

 
Well, hello there!  Goodness it has been WAY too LONG since the last time I have written up a blog post.  Ridiculously too long! Thank goodness I have the Secret Recipe Club that has pushed me in the right direction to get my creative juices flowing again for my precious little blog.  And it isn't like I haven't been baking up a storm - goodness no! - I just have been pre-occupied with things like Christmas (being a mommy/Santa to a 6 and 2 year old takes a lot out of me!), my littlest turning TWO and then of course working full-time along with all the other fun stuff in life.  I've missed blogging terribly!  I adore sharing my kitchen delights with all of you.  And I really hope to be able to manage my time differently so that I can get back into the groove of blogging more often.  True story, I do! :-)


I was given the opportunity to discover the K and K Test Kitchen blog this past month as it was my assignment from the Secret Recipe Club for the month of January. What an absolute treasure of a blog!  It is written by two beautiful women, Kelsey and Kim.  A mother and daughter in fact! And it is packed with delicious, beautiful and amazing recipes
 
It was a VERY easy decision for me to choose Samoa Blondie's as the recipe of my choice to make from their blog as my oldest daughter is in the thick of Girl Scout cookie sales right now.  AND my family just adores and worships Samoa cookies!  How can't you with all that lovely chocolate-caramel-coconut yumminess!?! And these fabulous bars sure are pretty darn close to being a "Samoa Cookie".  The butter is browned to allow for a perfect nutty and caramel taste that goes along with the sinful chocolate chips and decadent coconut.  Everyone gobbled down these little bars with rave reviews.   I even passed some of them out to my favorite Starbucks barestas as I drove through to get my morning coffee.  They LOVED having such a treat being passed through the window to them!


Bake a batch of these bars and pass them out to all your favorites that you come across on a daily basis....you will be worshiped forever if you do!
 
Thank you, thank you Kim and Kelsey for this fabulous recipe!  You have brought much happiness to my baking world!
 
Samoa Blondie Bars
(recipe from K and K Test Kitchen)
 
Ingredients:
 
10 Tbsp unsalted butter
1 cup brown sugar, packed
1/4 cup granulated sugar
1 egg
2 tsp vanilla extract
1/4 tsp salt
1 1/4 cup flour
1 1/4 sweetened coconut flakes
1 1/4 chocolate chips (I used milk chocolate)
 
Directions:
 
1. Preheat oven to 350.  Grease 8x8 pan well and set aside.
 
2.  Brown butter in a medium saucepan on medium to high heat.  Butter will melt completely and then bubble and pop.  When the butter starts to frizzle with smaller bubbles and the scent of the butter changes to a lovely nutty smell you have successfully "browned" your butter.  Allow browned butter to cool until just slightly warm...about 10 minutes.
 
3. In a large bowl mix all together browned butter, sugars, egg, vanilla extract and salt.  
 
4. Slowly add in remaining ingredients - flour, coconut and chocolate chips - until well blended all together.
 
5. Pour batter into prepared pan - batter will be thick. Carefully smooth all over top with a rubber spatula.
 
6. Bake for 25-27 minutes - be careful not to over bake your bars....edges will be slightly darker than the middle and come away from the pan when done. Cool for as long as you can stand it and cut into squares and enjoy!


Happy Samoa Blondie Bars Baking!


Monday, March 26, 2012

Fluffernutter Blondies (for the Secret Recipe Club)

I have a delightful treat of a recipe for you today! Yum, yum, YUM....Fluffernutter Blondies.  I found this recipe on the blog, The Spiffy Cookie that was assigned to me this month through the Secret Recipe Club. Definitely a recipe to make for those that you love, that you adore, that you know REAL well and even those that you may just know by name.  You will make ALL of them happy with these blondies (except those that are allergic to peanut butter as there is indeed PB in them as predicted by the name of these treats).  When you bite into one of these bars you will take a double take to the treat in your hand as you will think you just took a bite of a fluffernutter sandwich.  The taste of peanut butter and fluff melts in your mouth as you enjoy


The owner of The Spiffy Cookie, Erin is just adorable!  She is a graduate student that just adores to cook and bake - hmmm, sounds like someone else I know! Erin has worked hard on filling her blog with lots and lots of recipes.  Definitely take a moment to hop over to blog to check out her recipes. Also be sure to keep your eyes open for the gorgeous pottery in some of her pictures as SHE is one that has made them! Erin is an all around talented
gal. :-)

Fluffernutter Blondies
(recipe from The Spiffy Cookie)

Ingredients:

8 Tbsp unsalted butter, softened + 2 Tbsp for melting
1/2 cup granulated sugar
1/2 cup brown sugar
2 eggs
1 tsp vanilla extract
pinch of salt
1 cup flour
1/4 + 1/3 cup peanut butter, divided
1/2 cup marshmallow creme (otherwise known as, fluff)
1/4 cup white chocolate chips

Directions:

1. Preheat oven to 350 degrees F. Grease an 8x8 pan (I used a 9x9 pan with success) - set pan aside.

2. Cream together 8 Tbsp butter, white and brown sugar until light and fluffy.  Add in eggs and vanilla extract - mix to combine. Add in salt and flour - again mix until incorporated. Next add in 1/4 cup peanut butter.

3. Pour batter into prepared pan.

4. In a small sauce pan add in the remaining 2 Tbsp of butter, 1/3 cup peanut butter and marshmallow creme.  Cook over medium heat, stirring constantly as it melts until it is smooth.  Drizzle this lovely mixture over the batter in the prepared pan.

5. With a knife swirl the peanut butter/fluff melted mixture into the blondie batter.  Lastly, sprinkle the white chocolate chips over the top.


Pop pan into oven and bake for 20-25 minutes (23 minutes was just right for my blondies). Cool completely before cutting into bars.


Yum!  Enjoy!


Happy Fluffernutter Blondies Baking!

Friday, March 2, 2012

DEEP Dish Cookie Pizza


Pizza is so good.  In our house we have it at least once a week...sometimes twice in a good week. So yes, I have special place in my heart (or should I say tummy?) for pizza.  And as you all know very well by now I have a very special place in my soul for sweet baked treats.  Combine the two together and you have a SWEET pizza pie....HEAVEN.  A DEEP Dish Cookie Pizza - there is nothing wrong with that!  Yup, a lovely sugar cookie crust which is topped with a sweetened cream cheese frosting and fresh colorful fruit for the very top = a cookie pizza.
Not only does this recipe feed a crowd but it is a dessert that is fun.  Kiddos LOVE it and so do the grown-ups. A crowd pleaser of a dessert! :-)
DEEP Dish Cookie Pizza
(recipe from the Pioneer Woman - I am waiting on pins and needles for her NEW cookbook to show up on my front door!! Can't wait!!)
Ingredients:
1 1/2 cups shortening (butter can be substituted...which is what I used - unsalted)
1 1/2 cups sugar
1 tsp orange zest
1 tsp vanilla extract
2 eggs
8 tsp whole milk (I used 2%)
4 cups flour
3 tsp baking powder
1/2 tsp salt
*2 jars (13 oz. each) marshmallow creme (I only used 1 jar)
*2 packages (8 oz each) cream cheese - at room temperature (I only used 1 package)
A variety of FRESH fruit of your choice - berries, kiwi, pears, peaches, bananas
Directions:
1. Cream together shortening (or butter) with sugar, orange zest, and vanilla extract for a couple of minutes until mixture is light and fluffy.   Add in eggs and beat again until light and fluffy.  Add in milk and mix.
2. Sift together dry ingredients - flour, baking powder and salt. Add to the creamed mixture. 
3. Remove cookie dough from bowl and slightly flatten between two sheets of waxed paper.  Refrigerate for 1 hour or freeze for 20 minutes.
4. Press dough into cookie sheet that has a 2" deep rim. Or you can divide dough into 2 pieces and roll out into large circles and place in a pizza pan (I used one cookie sheet).
5. Bake for 12-15 minutes until cookie dough is cooked and is lightly browned but not overly crisp.  Remove from oven and cool completely.
6. Make frosting while cookie sheet cools. *Combine marshmallow creme and softened cream cheese - beat until light and fluffy. I only used 1 jar of marshmallow creme and 1 package of cream cheese for my frosting - which gave me plenty to cover my cookie crust with some left over.
7. Spread frosting over cookie crust and then generously decorate with sliced fruit of your choice.  Slice into wedges or squares.
Enjoy!

Happy DEEP Dish Cookie Pizza Baking!

Monday, February 27, 2012

FRESH Raspberry Crumb Bars

It has been two years since I started this blog.  It really is simply amazing how fast two years has gone by.  Within these past two years I have grown to love, respect and appreciate greatly the world of blogging - especially food blogging.  The talent, creativity and passion that is put into food blogging is immense.  When I am not updating my own blog (which unfortunately recently has decreased a great deal for me since I have gone back to work full time) I am enjoying discovering other blogs that are devoted to food.  And it has been through my involvement of the Secret Recipe Club that I have been introduced to countless other food blogs that leave me in awe and amazement of all the work, devotion and deliciousness that exists in food blog land. 


This month my blog assignment from the Secret Recipe Club was a lovely blog by the name of Lemon Drop.  Isn't that name just adorable!?! I love it! And what a fun blog Linda, the owner of Lemon Drop has created.  It is packed with fresh and delicious recipes all which have been paired with wonderful pictures that leave your mouth watering.  And for those of you that are searching for gluten-free recipes this is the place for you.  Lemon Drop has countless gluten-free recipes that are sure to catch your eye....and your palate.


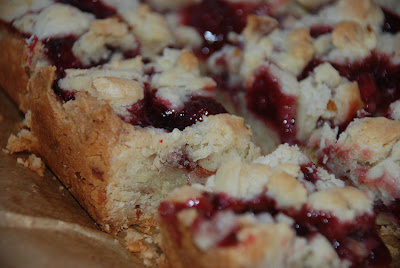
The recipe I choose to make from Lemon Drop is called,  FRESH Raspberry Crumb Bars (which are not gluten-free).  Man,  oh man are these bars GOOD!!! What a treasure of a recipe!!!  Four words come to mind when I think of these bars; SIMPLE, EASY, DELICIOUS and VERSATILE.  In a nut shell they are super delicious, easy to make, the ingredients are nothing fancy and the recipe allows for flavor changes or substitutions if so desired.  I highly, highly recommend that you make this recipe for yourself especially if you are a berry lover.   The raspberries in these bars are show cased perfectly along side the tender crumbs of the crust and topping.  Instead of using chopped walnuts as the original recipe asked for I used silvered almonds.  Yum.  Raspberries and almonds are just made for one another in my book.

FRESH Raspberry Crumb Bars
(recipe slightly altered from Lemon Drop)

Ingredients:

2 1/4 cup flour
1 cup sugar
1 cup butter, at room temperature
1 egg
1 tsp almond extract (this was my addition)
1 heaping cup chopped nuts (walnuts, almonds or pecans are a great choices)
1 cup fresh raspberries (I used 1/2 cup fresh and 1/2 cup frozen without any problem)
3/4 cup seedless raspberry jam

Directions:

1. Preheat oven to 350 degrees F. Line an 8x8 pan with parchment paper so that 2" are above the top of the pan.

2. Cream together butter and sugar.  Add in flour and then egg followed by almond extract.  Add in nuts of your choice by stirring quickly but gently just to incorporate into the batter. Set aside.

3. In a medium bowl add in raspberry jam and stir to loosen then add in raspberries and stir just to coat with jam.

4. Press 1/2 of the batter into bottom of prepared pan to create the crust of the bars. Dollop berry/jam mixture over crust....this is where a little helper comes in handy...


....and then take remaining batter and break pieces all over berry/jam layer as this will be the "crumble" of the bars....


5. Pop into oven and bake for 40-45 minutes or until top is lightly browned.  Cool completely before cutting and serving.

Enjoy with yummy happiness!  And a HUGE thank you to Linda from Lemon Drop for sharing such a wonderful recipe!  I am delighted to have discovered your blog and this recipe.


Happy FRESH Raspberry Crumble Bar Baking!

Tuesday, January 24, 2012

White Chocolate Cranberry Bars


I often find myself thinking ahead to the next holiday.   Not only to plan an activity or event around it but also to make sure I have plenty of fun things to bake for that particular holiday.  I guess its all part of my passion for baking. 

This past holiday season I did a huge amount of baking - not only for my family and friends but also for a local gift shop that wanted to sale homemade baked goodies for the holiday season.  I was a baking fool!  And I was in "baking HEAVEN" as I had an opportunity to bake to my hearts content many of the recipes that I had been accumulating on my wish list.  One of the recipes that I made was called, White Chocolate Cranberry Bars.  I found the recipe in the Fat Witch Brownies cookbook - originally the recipe was just for White Chocolate Bars but because I was in the mood for some dried cranberries I decided to sprinkle some into the batter.  Success I say! The tart sweetness of the cranberries was perfectly paired with the smooth richness of the white chocolate. I was delighted with the results!


Valentine's Day is just around the corner.   These brownies would be just perfect for Heart Day as it is made with chocolate (how can you not bake something with chocolate in it for Heart Day!) and it has a sprinkling of red from the dried cranberries.  I am thinking that I will make a batch of these brownies and then cut out servings with heart cookie cutters.  A perfect Valentine's Day treat!


White Chocolate Cranberry Bars
(slightly adapted from Fat Witch Brownies)

Ingredients:

6 oz. white chocolate, coarsely chopped
5 Tbps unsalted butter
2 large eggs
1 cup sugar
1 tsp vanilla extract
1 cup flour
1/2 tsp baking powder
1/4 tsp salt
3/4 cup dried cranberries

Directions:

1. Preheat oven to 350.  Grease a 9x9 baking pan with butter and dust with flour lightly.  Tap out any excess flour.

2. Melt white chocolate and butter in small saucepan over low heat.  Stir constantly so as to make sure that the chocolate does not burn.  Remove chocolate and butter from heat before completely melted and continue to stirring until mixture is completely smooth.  Set saucepan aside to cool.

3. Beat eggs, sugar and vanilla extract all together in a large bowl until smooth.  Add in white chocolate butter mixture and mix until well combined.

4. Measure flour, baking powder and salt into a sifter or fine sieve - sift together directly into batter.  Mix until well combined and there is no trace of the dry ingredients remains. 

5. Spread batter into prepared baking pan with a spatula. Bake for 25 minutes or until the top is light brown and cracked.  Turn off oven and leave pan inside oven for 8 more minutes.
Remove from oven and cool completely before cutting and serving. 

YUM!


Happy White Chocolate Cranberry Bars Baking!

LinkWithin

Related Posts with Thumbnails

ShareThis