Image Map

Wednesday, June 1, 2011

Sweet and Tart Rhubarb Cake


I am delighted to report that I am now officially an owner of a rhubarb plant! Yes, for years now I have been wanting my very own rhubarb patch.  Many of my friends have offered me a snippet of their patch as rhubarb very easily transplanted but for some reason I never got my act together and took them up on their offer.  A couple weeks ago Jeff came home with a couple of plants from a friend's garden and guess what, rhubarb was one of them!  Happiness, I will now have my very own rhubarb patch next year!
So quick, go grab some rhubarb that may be still left in your garden or in the grocery store and make this cake.  I love this recipe for not only is it packed with tart rhubarb (which is shredded rather than cut into small chunks) and a good helping of cinnamon but it also calls for 1/2 cup of yogurt.  In all my baking experience whenever a recipe includes yogurt in it the end result is always deliciously moist.  Needless, to say this cake was indeed moist....which I blame on the yogurt.  Originally, plain non-fat yogurt was called for but all I had was Greek vanilla yogurt - the substitution worked out great!

Sweet and Tart Rhubarb Cake
(recipe slightly adapted from Confessions of a Bakeaholic - gorgeous and scrumptious blog!)

Ingredients:

4 stalks of rhubarb - peeled, cut in 1/2 and pull into strips


3 eggs

1 cup canola oil

1 1/2 cups sugar

2 1/2 cups flour

1/4 tsp baking powder

1 tsp baking soda

4 tsp cinnamon (yes, this is the correct amount...there is a lot of cinnamon in this cake - adjust if you so wish)

1 dash ground nutmeg

2 tsp vanilla extract

1/2 cup plain or vanilla yogurt (I used vanilla Greek yogurt)

Directions:

1. Preheat oven to 350 degrees F.  Grease pan of choice - BUNDT, 9x13 or two loaf pans.

2. Prepare rhubarb by peeling off thin stringy layer, then cutting stalks into 5-6" pieces and then peeling into strips (as seen in picture above).

3. In a large bowl beat together eggs, oil, sugar and vanilla extract.  Slowly add in dry ingredients - flour, baking powder, baking soda, cinnamon, nutmeg.  Combine thoroughly.

4. Add in prepared rhubarb and yogurt - stirring until well combined.

5. Pour cake batter into prepared cake pan of choice.  Bake for 45-55 minutes or until toothpick inserted in center comes out clean.  Cool at least 10 minutes in pan before removing to serving platter.

*I served this cake without frosting but of course if you would like to kick it up a notch, frost it with your favorite Cream Cheese Frosting....super yum! You could also add in a cup of cut up strawberries to the cake batter as another variation on this recipe.


Happy Sweet and Tart Rhubarb Cake Baking!


Friday, May 27, 2011

BUNDT Cake MAGIC

BUNDT cakes are fabulous in my world.  They are lovely to look at, always yummy to eat and made in jiffy. And you know what else I like about BUNDT cakes? - I like the way the word BUNDT cake sounds.  It's just fun to say.  I know, silly me!  

Who could ask for anything more in a cake?  Well, I guess the only thing I could ask for is MORE BUNDT cake recipes.  Got a favorite?  Please do share.  Pretty, pretty please. 


In my effort to share with you a wonderful BUNDT cake recipe I thought I would show and tell you all about a Root Beer Float BUNDT Cake.  Yes, you heard me right...this is a cake fully flavored with root beer soda.  PERFECT to make for this coming season of BBQ's and picnics! 

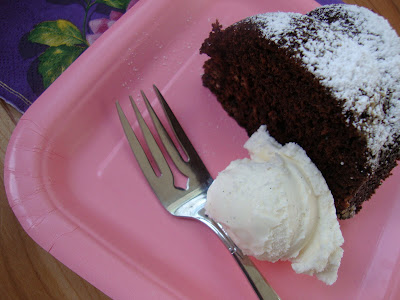
Now, you can stay simple or go fancy with this cake.  By simple I mean just sprinkling it with some powdered sugar. To make it fancy you could drizzle the cake with a Root Beer Glaze (recipe shared below).  It's your choice 100%.  I do have to say that by serving it with a nice scoop of vanilla ice cream on the side really took this cake up a knotch of yumminess.  Especially when I served the cake the day after it was baked for then the flavor of the root beer was much more pronounced than the first day.

  
Root Beer Float BUNDT Cake
(recipe found on Piece of Cake which was adapted from Baked: New Frontiers in Baking - I can't wait to treat myself to this cookbook!)

Cake Ingredients:

2 cups root beer

1 cup unsweetened cocoa powder

1/2 cup unsalted butter, cut into pieces

1 1/4 cup sugar

1/2 cup firmly packed brown sugar

2 cup AP flour

1 1/4 tsp baking soda

1 tsp salt

2 large eggs

Glaze Ingredients:

2 cups powdered sugar

1/3 cup unsweetened cocoa powder

1/4 tsp salt

1 tsp vanilla extract

1/4 cup root beer

3 Tbsp unsalted butter, VERY soft


Cake Directions:

1. Position an oven rack to the lower 1/3 of the oven.  Preheat oven to 325 degrees F. Spray a 10" BUNDT pan generously with nonstick cooking spray.

2. In a medium saucepan combine root beer, cocoa powder and butter.  Cook over medium and stir often.  Once butter is melted whisk in sugars until well combined.  Turn off heat and set aside mixture to cool.

3. Sift together flour, baking soda and salt in a large bowl. Set aside.

4. Lightly beat the eggs in a small bowl and then whisk them into the cooled root beer/cocoa powder mixture.  Make a well in the center of the flour mixture and pour root beer/cocoa powder/egg mixture right into the middle of it.  Mix all together until just combined.  Batter will be slightly lumpy.

5.  Pour batter into prepared BUNDT pan.  Place in oven and bake for 45-50 minutes.  Let cake cool for at least 30 minutes in pan before inverting to a serving platter.  Sprinkle with powdered sugar or make Root Beer Glaze.

Root Beer Glaze Directions:

1. In a medium bowl wisk together powdered sugar, cocoa powder, salt, vanilla extract and 1/4 cup root beer.

2. Add in VERY soft butter and mix until smooth.  Add in a little bit more of root beer if you find that the glaze needs to be thinned out for a better spreadable consistency (you don't want it to be too runny).  Spoon glaze over cake and let sit for 15 minutes before serving.
Keep cake at room temperature covered or refrigerate (it lasts longer if refrigerated).


Enjoy!


Happy Root Beer Float BUNDT Cake Baking!


Thursday, May 19, 2011

Peanut Butter Oatmeal Raisin Cookies


I like chewy cookies.  I like oatmeal.  I also like peanut butter.  AND I even like raisins!  Some people don't like any of these foods mentioned above (how can you NOT like cookies?!...I mean really!).  Some people only like one of said foods from above and well, some people don't like the combination of oatmeal, peanut butter and raisins put together.  And that's just fine.  But, if you are into having a chewy and healthy cookie that fills you up and can be eaten for breakfast, lunch or dinner than this cookie recipe is for you.  Yes, YOU!


Peanut Butter Oatmeal Raisin Cookies
(recipe slightly adapted from Heather on Tasty Kitchen)

Ingredients:

1 stick unsalted butter, softened

1 cup sugar

1 cup brown sugar, packed

3 eggs

1 tsp vanilla extract

2 tsp baking soda

1 tsp salt

1 tsp cinnamon

1 1/2 cup peanut butter (I used smooth)

4 cups oatmeal

1 cup raisins

Directions:

1. Preheat oven to 350 degrees F.

2. Cream together softened butter and sugars.  Add in eggs and vanilla extract - mix until well combined.

3. Add in remaining ingredients to the butter/sugar/egg/vanilla extract mixture.

4. Line cookie sheets with parchment paper or Silpat.  Scoop out cookie dough with desired size scoop (I used a small and medium scoop from Pampered Chef).

5. Bake for 12-15 minutes or until cookies are done.  Allow cookies to sit on cookie sheets for a couple of minutes before removing.

Store in an air-tight container with a nice piece of soft bread (which helps the cookies stay soft and chewy).

Enjoy!!!


Happy Peanut Butter Oatmeal Raisin Cookies Baking!

Sunday, May 15, 2011

Baked Mac and Cheese

My goodness it has been a long time since the last time I posted a recipe!! WAAAY too long!  I am hiding my head in shame....but honestly my excuse is only because life has simply grabbed ahold of me and wouldn't let me deviate from taking care of my kiddios by making sure they were feed, cleaned and most importantly HAPPY! I have often looked at my computer longingly , wishing to sit down in front of it and type out a blog post but then I suddenly get pulled in another direction and then yet another day goes by without a blog post.  I know you guys get it.  I'm sure you totally get it as the very same thing happens to many of you mommas or not.  But most importantly know that I've missed all of you! - my dear and precious followers and fellow bloggers.  I've so missed you!


Anyway, upward and onward with my recipe today that I wish to share with all of you...Baked Mac and Cheese!!!!   Like Chocolate Chip cookies I am always looking for a new and super yum recipe for Mac n Cheese.  I make it often (from the box and from scratch) so it's fun to switch it up a bit and make a different recipe every once and awhile from the one I use most often.

This recipe is great.  Full of good cheese, a dab of sour cream and even a couple eggs and viola the magic of pasta and cheese come together to form a lovely dish of Mac and Cheese.  The credit of this recipe goes to the fabulous Tina of Mommy's Kitchen who found the recipe from the good ole adorable Deen Brothers (Paula must be SO proud of them!!!).


Baked Mac and Cheese
(recipe found on Mommy's Kitchen from the Deen Brothers cookbook, Recipes From the Road)

Ingredients:
2 cups uncooked elbow macaroni (or small pasta of your choice)

4 cups shredded cheese - I used a mixture of Colby Jack and Cheddar (yummy combo!!)

1 cup milk - whole milk is suggested, I used 2% and it was great

1/2 cup sour cream

2 eggs

1/4 cup unsalted butter, cut into pieces

1/2 tsp salt

dash of hot sauce - optional

Directions:

1. Preheat oven to 350 degrees F.  Grease a 9x13 baking dish - set aside.

2. Cook pasta according to directions on package.  Drain pasta and return to pot that it was cooked in.

3. While pasta is still HOT add in the cheeses and stir well to combine.  Spread pasta and cheese mixture into prepared baking dish.

4. Whisk together milk, sour cream, eggs, butter pieces, salt and hot sauce (if you are using it) in a medium bowl.  Pour mixture over macaroni and cheese.

5. Bake for 35-40 minutes or until golden brown and bubble good.  Let stand out of oven for 10 minutes before serving.
Enjoy!!!


Happy Baked Mac and Cheese!


Friday, April 22, 2011

Chewy M and M Cookies (with a surprise ingredient)

I caught your attention when I said "SURPRISE" didn't I? I sure hope I did!  Surprises are one of my most FAVORITE things in life to give and to receive. :-) Hopefully, many of you will be surprised with this ingredient in these cookies as I have never seen such an ingredient in cookies before.  The surprise ingredient is BREAD FLOUR.  What do you think?  Was that a surprise?  Well, whether it was or not you have got to try this recipe....especially if you like cookies that are chewy on the inside and crisp on the outside along with a perfect not overly sweet taste.  You will not be disappointed with this cookie recipe. 


As you can see in the above picture I choose to use Spring M and M's to gently stir into my cookie batter.  Of course good old fashioned chocolate chips can be easily substituted for the M and M's. 

Chewy M and M Cookies
(recipe comes from Delightfully Dowling....a blog full of drool worthy recipes)

Ingredients:

1 cup unsalted butter, melted

2 1/4 cup bread flour (Hello, surprise ingredient)

1 tsp salt

1 tsp baking soda

1/4 sugar

1 1/4 cup brown sugar

1 egg + 1 egg yolk

2 Tbs milk

1 1/2 tsp vanilla extract

2 cups M and M's (or chocolate chips)


Directions:

1. In a large bowl sift together flour, salt and baking soda.  Set flour mixture aside.

2. Cream together melted butter, white and brown sugar on medium speed for a couple minutes.  Then add whole egg and egg yolk along with milk and vanilla extract.  Mix all together until well combined.

3. Chill dough for at least an hour.  Line cookie sheets with parchment paper or Silpat liner.  Preheat oven to 375 degrees F.  Scoop cookie dough into nice balls with a medium size ice cream scoop onto cookie sheets and then place in oven (I like to bake my cookies one cookie shee at a time) and bake for 11-12 minutes.

4. Cool cookies and store in an airtight container.

Enjoy!

Mr. Chicky sure did!!! ;-)


Happy Chewy M and M Cookie Baking!

Wednesday, April 20, 2011

PB Marshmallow Brownies (with HONOR and compliments)

Don't you just love giving someone a compliment?  To see their face light up with happiness or a soft blush come over their cheeks is always so rewarding to me.  Unfortunately for many (including myself) it is often easier to give a compliment than to receive one.  I work hard on accepting compliments with grace and appreciation even though it may make me feel uncomfortable.  It's just one of those things that I continually have to work on in life....I've accepted it.

Well, not that long ago I received a very BIG compliment.  I was asked by a fellow food blogger, the sweet Maranda of Jolts and Jollies to be a guest on her blog.  OMGoodness was I so happy that she asked me to do so! I have never been asked to be a guest on someone elses blog before!!!  In my humble opinion it is a very HIGH compliment to be asked to write a post on someone else's blog - they are trusting that you will provide the same kind of care, appeal and creativity that they themselves work so hard to provide to their blog followers, family and friends.  Needless to say I was over come with honor when Maranda presented me with her proposition.  Thank you, thank you Dear Maranda for asking me to be a guest blogger on your precious, delicious and fabulous blog.   I enjoyed every minute of it!

Go check out what I wrote up and featured on my guest post on Jolts and Jollies....it sure is YUMMY.  And yes, it contains not only peanut butter but also chocolate and marshmallows coming all together in one lovely brownie. Scrumptious to the MAX!


And while you are over at Jolts and Jollies be sure to check  Maranda's delicious recipes.  You won't be disappointed!

I thought I would leave you today with one of my favorite recent views in life.  It just makes me so happy to look at I must say!


Can you guess who it is?  Yup....my little Coco-Nut :-)


Sunday, April 3, 2011

A Springtime CAKE (make this cake while you are Spring cleaning)


Oh, Springtime I do so adore thee!  I love the fact that soon outside we will have fresh green grass, little baby leaves starting to show their faces on the trees along with bright colored tulips and sunny daffodils. Springtime is full of freshness and new growth that brings me such happiness.  It's funny how all of a sudden a new sense of "getting things done" also known as Spring Cleaning gets sparked for me when I feel the reality of all the new growth of life starting to bloom outside. 

As I was buzzing around cleaning and tidying up my house the other day I decided to try out a cake recipe that a good friend of mine (Hey, sweet Diane!) had passed along to me last year.  It is called Key Lime Cake.  A perfect cake that comes together in a jiffy and brings along with it a taste of fresh lime, sweetness and a tender crumb texture.  Yum! The perfect Springtime cake. :-)


Key Lime Cake
(recipe can be found on the allrecipes website)

Cake Ingredients:

1 (18.25 oz) package of LEMON cake mix

1 (3 oz) package of instant LEMON pudding mix

3/4 cup water

1/2 cup canola oil

4 eggs

5 Tbsp LIME juice

Glaze Ingredients:

1 1/2 cups powdered sugar

3 Tbsp LIME juice

LIME zest for garnish (if you wish)

Directions:

1. Preheat oven to 350 degrees F. Lightly grease a 9x13 pan or a 10" bundt pan.

2. In a large bowl combine cake mix, pudding mix, water, oil, eggs and 5 Tbsp of LIME juice.  Mix well all together.  Pour batter into your prepared cake pan.

3. Bake for 45 minutes.  As cake is baking mix together powdered sugar and 3 Tbsp of LIME juice for your glaze.  Pour glaze over still warm cake. Garnish with freshly grated LIME zest.

This cake is lovely served with fresh berries.....ENJOY!


Happy Key Lime Cake Baking!

LinkWithin

Related Posts with Thumbnails

ShareThis