Image Map

Monday, December 26, 2011

Almond Torte for the Secret Recipe Club


Today I greet you with a beautiful recipe for an Almond Torte.  This month for the Secret Recipe Club I was assigned to an amazingly savory and creative food blog called, Gastronomical Sovereignty .  My goodness is Kristy a talented cook!  She makes dishes that I dream of having on my table every night.  Vegetables of all kinds is one of her focuses along with many, many spices all coming together to make beautiful dishes.

As many of you know so well, I tend to gravitate towards the sweets of life.  I choose an Almond Torte to make from Kristy's collection of recipes.  A simple recipe that requires simple ingredients yet has a very satisfying result.  As mentioned by Kristy this cake is perfectly paired with a nice HOT cup of tea.  I do have to say that in order for this cake to be a success you must have a food processor as you will need to grind roasted almonds and granulated sugar to achieve the right consistency for the recipe.


Almond Torte

Ingredients:
450 g whole blanched almonds, lightly roasted
10 1/2 Tbsp butter, at room temperature
1 1/2 cup granulated sugar
6 eggs
1 cup flour
2 tsp grated lemon rind (1 lemon gave me the perfect amount)

Directions:

1. Preheat oven to 325 degrees F. Lightly grease 9" spring form pan.

2. Place roasted almonds in food processor and grind for about 20-30 seconds to obtain a fine consistency.  Do the same with the granulated sugar.
3. Cream together butter and granulated sugar until light and fluffy.  Add in eggs one at a time to combine well after each addition.
3. Stir in ground almonds, sugar, flour and lemon rind. Mix just until all combined.

4. Pour batter into prepared spring form pan and bake for 1 hr and 20 minutes. Cool for 5-10 minutes before removing side of pan.

Share with dear friends and family - serve with hot tea or coffee.  YUM!


Happy Almond Torte Baking!


Tuesday, December 6, 2011

Shrimp Fried Rice

It is essential to have a quick, super yummy, stress free and healthy dinner recipe up your sleeve for this time of year. I am sure many of you are starting to get that heavy almost dizzy feeling of holiday craziness swirling around in your head by now.  Goodness it is almost 2 1/2 weeks until Christmas (yes, I said 2 1/2 weeks!) by golly!  Don't panic.  It will ALL get done some how or another.  And if it doesn't....well, there is always next year.  Can you tell how I calm myself down when I start to panic about not being able to fit it all in or complete all those last minute "most make" or "must bake" or "must finish" projects?  I reason with myself.  That's all there is to it.  And then I eat something delicious and all my stress disappears just like that!  Magic. Simple and pure magic. 

 Today I want to share with you a little magical recipe for dinner time (or lunch if you are so inclined).  It is simple.  It is quick. It is even flexible as far as ingredients are concerned.  And yes, it is SUPER good!  Shrimp Fried Rice.  And, if you really want you could add cooked beef or chicken to the rice instead of shrimp.  Or you could just load it up with lots of veggies and call it a Veggie Fried Rice.  Go nuts with this recipe.  Make it your own variation of fried rice with what you choose to add in to it.  No matter what it will be magically d'lish!


Shrimp Fried Rice
(recipe found on my go-to recipe source, Tasty Kitchen - I just LOVE this site!!)
Ingredients:

1 cup rice (white or brown)
4-6 Tbsp butter (you choose how crazy you want to get with your butta...I used 4 Tbsp and it was plenty)
1 lb shrimp,  washed, shelled and deveined
1 cup frozen peas
1/2 onion, chopped
1/3 cup soy sauce (more or less depending on your taste)
3-4 green onions, chopped

Directions:

1. Cook rice in 2 cups water until done.  Add in butter and toss around a bit so that it melts into rice nicely.

2.  Saute chopped onions until soft and translucent.  Add to rice along with soy sauce, peas and shrimp.   Cook all together for a good 5-7 minutes making sure peas are no longer frozen and shrimp is not over cooked.

3. Just before serving toss in chopped green onions and then sprinkle some on top of dish just for good measure (and to make it pretty).


Enjoy!

Happy Shrimp Fried Rice Making!

Sunday, November 27, 2011

Honey Challah Bread for Secret Recipe Club

There are many things in life that make me happy.   For example; a beautiful tablecloth, a cup of tea/coffee shared with a close friend, precious baby leaves on the branches of a tree in the Spring-time, the hands and smiles of my children and the process of making bread made with yeast.  Yes, I love to make bread.  I love the process of taking simple ingredients and creating a soft and full bowl of dough that comes alive before my eyes creating a master piece of yumminess into a loaf of bread. 


This past month I was given a gift of a new recipe for a bread made with yeast, Honey Challah.  I discovered this recipe as I was exploring the blog, Farm Girl Gourmet as I was assigned this amazing blog for the month of November from the Secret Recipe Club.  I felt so fortunate to be assigned Farm Girl Gourmet's blog.  I actually double checked my email that contained my blog assignment just to make sure my pure happiness was in the right place as I was over the moon excited to have been given the blog Farm Girl Gourmet.  Heather's blog is packed with beautiful recipes that are explained to perfection and shown with amazing and very helpful pictures. I have had so much fun frequenting her blog and getting to know her from afar.  If only we lived closer I might have just invited myself over for tea as she seems like someone I would just adore getting to know in real life.  :-)

I have been looking for a good Challah recipe now for some time so when I opened Heather's blog to discover that she had the very recipe I had been searching for I couldn't resist making her bread.  What a gem of a recipe!  So easy and out-of-this-world delicious!  It will be a perfect bread for me to make as gifts for this holiday season. 

Honey Challah
(recipe from Farm Girl Gourmet)

Ingredients:

1 cup warm water
4 1/2 tsp yeast
1/2 cup sugar + 1 tsp sugar
1/2 cup honey
1 stick unsalted butter, at room temperature
3 eggs
2 tsp salt
4 1/2 - 5 cups flour (more if needed)
1 egg beaten, for the egg wash

Directions:
1. Add warm water to the bowl of a standing mixer.  Attach dough hook.  Sprinkle yeast and 1 tsp sugar over the warm water.  Stir all together briefly and allow the 3 ingredients to grow together for 5 minutes.


2. Add in the remaining 1/2 cup sugar, honey, butter, 3 eggs, salt and 4 1/2 cups flour to the bowl.  On the lowest speed, mix all together until the flour is mostly incorporated and then increase speed to medium and mix for 5 minutes.  Dough will become smooth with elasticity.  Add in more flour if needed to make a soft craggy ball (I had to add in at least another cup to get to this stage but don't add too much flour as you want your dough to be very soft).  
3. Turn dough onto a lightly floured surface and knead by hand about 5 times.  Place dough in a lightly oiled bowl and turn to coat all sides of dough.  Cover with a damp, clean towel and place in warm draft free area for 2 hours, or until doubled in size.  (I placed my covered bowl in a closed oven that I had warmed briefly on the lowest temperature and then turned off as Heather so brilliantly suggested to do in her recipe. It worked like a charm!)

Hello there magical dough!


4. Gently punch down dough and then place on a lightly floured surface.  Divide dough into 3 equal pieces.  Using your hands, roll out each piece to a 14" rope.  Pinch the 3 ropes together and then braid loosely, pinching together at the end.


5. Place braid on a parchment paper lined cookie sheet.  Allow dough to rest and double in size in a draft free location - which should take about 45 minutes.

6. Preheat oven to 350 degrees F. Brush braided bread completely with beaten egg.  Bake for 30-35 minutes until golden brown.  Cool on baking sheet for 10 minutes before removing to a wire rack to cool completely.


Make sure you slice off a piece of this heavenly bread while it still holds some heat from the oven.  Slather it with butter, close your eyes and take a bite.  You won't regret it.  I promise you!


Served with your favorite jam is also quite yummy....


I want to take a moment to show my deep appreciation to Amanda, who created the Secret Recipe Club and Tami who does such an amazing job as the hostess of my group (Group D). I am having so much fun discovering new blogs and making new friends through the fun of the Secret Recipe Club!


Happy Honey Hallah Bread Baking!

Sunday, November 13, 2011

Apple Pie Cake

I actually have an APPLE recipe for you today instead of a PUMPKIN recipe! I feel like all I do is bake with pumpkin these days.  Which is not a bad thing at all believe me (I ADORE pumpkin!!) - but I like to provide a little variety in my baking to keep my friends, family and blog readers happy. :-)


When I came across this recipe for an Apple Pie Cake my eyes grew wide, my heart started to beat faster and bounced in my chair with happiness.  An Apple Pie Cake sounded AMAZING!  Boy, oh boy was it ever!  So yummy.  So easy to make. AND it only requires 6 ingredients to make!!!! Yup, only SIX

You will need a 9 inch springform pan to make this apple-lious treat. A lovely mixture of brown sugar, cinnamon, flour and (COLD) butter form the bottom, sides and top of this pie/cake.  You will first gently press a large portion of the brown sugar/flour mixture on the bottom and sides of the springform pan, fill the inside with all your prepared tart apples and then top apples with the remaining brown sugar/flour mixture.  Which becomes the top of the pie/cake. It all comes together like magic as you are using such simple ingredients to make a wonderfully unique and delicious dessert.  So grab some apples, your springform pan, a couple of ingredients from your pantry and fridge and preheat your oven to create a perfect Fall dessert.   Then invite me over for a piece - I will bring freshly sweetened whipped cream to go on top! ;-)


Apple Pie Cake
(from the famous Martha Stewart)

Ingredients:

2 cups flour
1 cup packed light-brown sugar
2 tsp ground cinnamon
2 sticks cold unsalted butter, cut into pieces
about 12 tart apples - such as Granny Smith
2 Tbsp lemon juice

Directions:

1. In a large bowl, combine flour, brown sugar and 1 tsp cinnamon. With a pastry cutter add in butter pieces and cut into flour mixture until small pea size pieces remain. 


2. Press 2/3 of the brown sugar/flour/butter mixture on the bottom and up 1 inch of the sides of a 9 inch springform pan. Set pan aside.


3. Preheat oven to 350 degrees F.  Prepare apples by peeling and then slicing into thin slices and placing in a large bowl.  Sprinkle apples with lemon juice so that they do not turn brown and then sprinkle with remaining 1 tsp of ground cinnamon.

4. Place sliced apples into the shell of your prepared springform pan, pressing down gently as you pack them in.  If the apples mound over the edge of your pan that is ok - the more the better!  Sprinkle remaining brown sugar/flour/butter mixture over apples.

5. Line a cookie sheet with tin foil and then place prepared dessert on top before popping the whole thing into the oven.   Bake for 1 hour and 15 minutes or until golden brown on top. When pie/cake come out of the oven carefully run a knife around the edge of the pan and then allow to cool so that the magical yummy treat can set.

Serve at room temperature if you wish!


Happy Apple Pie Cake Baking!

Saturday, November 5, 2011

Pumpkies (the cutest name ever)

I mean seriously doesn't it make you want to say, "ahhh" when you hear the word pumpkie?  I just love that word! And I love what a pumpkie actually is! Can you guess what it is? It is not a cookie.  Not cake. Not even a mini pie.  It's a.....brownie!  Yes, a pumpkin brownie! A lovely, sweet and easy to make pumpkin brownie.  A Pumpkie.  Go ahead, you can say it - it will make you smile. :-)


Want the recipe? I know you do!

Pumpkies
(recipe from Mother Thyme - I so LOVE Jennifer's blog)

Ingredients:

1/3 cup butter, softened
1 cup sugar
1 egg
1/2 cup pumpkin puree
3/4 cup flour
1 tsp pumpkin pie spice
1/2 tsp cinnamon
1/4 tsp salt

Directions:

1. Preheat oven to 350 degrees F. Grease an 8x8 baking pan - set aside.

2. Beat butter until light and fluffy - about 2-3 minutes.  Add in sugar, egg and pumpkin puree.  Mix all together until well combined.

3. Add in flour, spices and salt to your pumpkin mixture.  Mix all together until well combined.

4. Pour batter into prepared pan and then pop into preheated oven for 30-35 minutes.  Cool as much as you wish and serve.

*I served mine slightly warm and wished that I had some freshly whipped cream to dollop on top as I think that would have been super yummy...next time I will do so!


Happy Pumpkies Baking!


Monday, October 31, 2011

It Is Secret Recipe Club Time!

Recently I joined a fun cooking group online called, The Secret Recipe Club.  Oh. My. Goodness what fun! I was assigned a LOVELY blog and from that blog I got to choose a recipe to make and then share with all of you.  But I couldn't reveal the blog or the recipe until today!  So without any further waiting my secret recipe for today is, Mini Pumpkin Muffins....


.... from the wonderful blog, Everyday Sisters. :-)

Not only did I enjoy this recipe (as I am sure you guys will too) but I fell head over heels in love with this blog!  Four (yes, FOUR...two of which are identical twins and all four of which are just lovely inside and out -  I can tell by their sweet smiles.) sisters have created and contribute to Everyday Sisters. All of them are just lovely - I feel like I know them personally now that I have been following them for the past month.  I felt honored to get to know them via their blog.  I love the variety of recipes that they offer such as Bistro Style Pasta Neapolitano (super yum looking and simple to throw together), White Zinfandel Sangria (one of my all time favorite kinds of drinks...the recipe lots so GOOD!) and Blueberry Cheesecake (which won an award!).  Yup, I did a lot of drooling as I looked through their blog. So many yummy recipes!! :-)

 
I loved these Mini Pumpkin Muffins! These little gems only required 5 ingredients - simple, yummy and fun.  Nothing better than that. Amen! And because they were so yummy and simple to make I made a batch to send to my oldest daughter's Halloween party at school today. I think all the kiddos will love them!

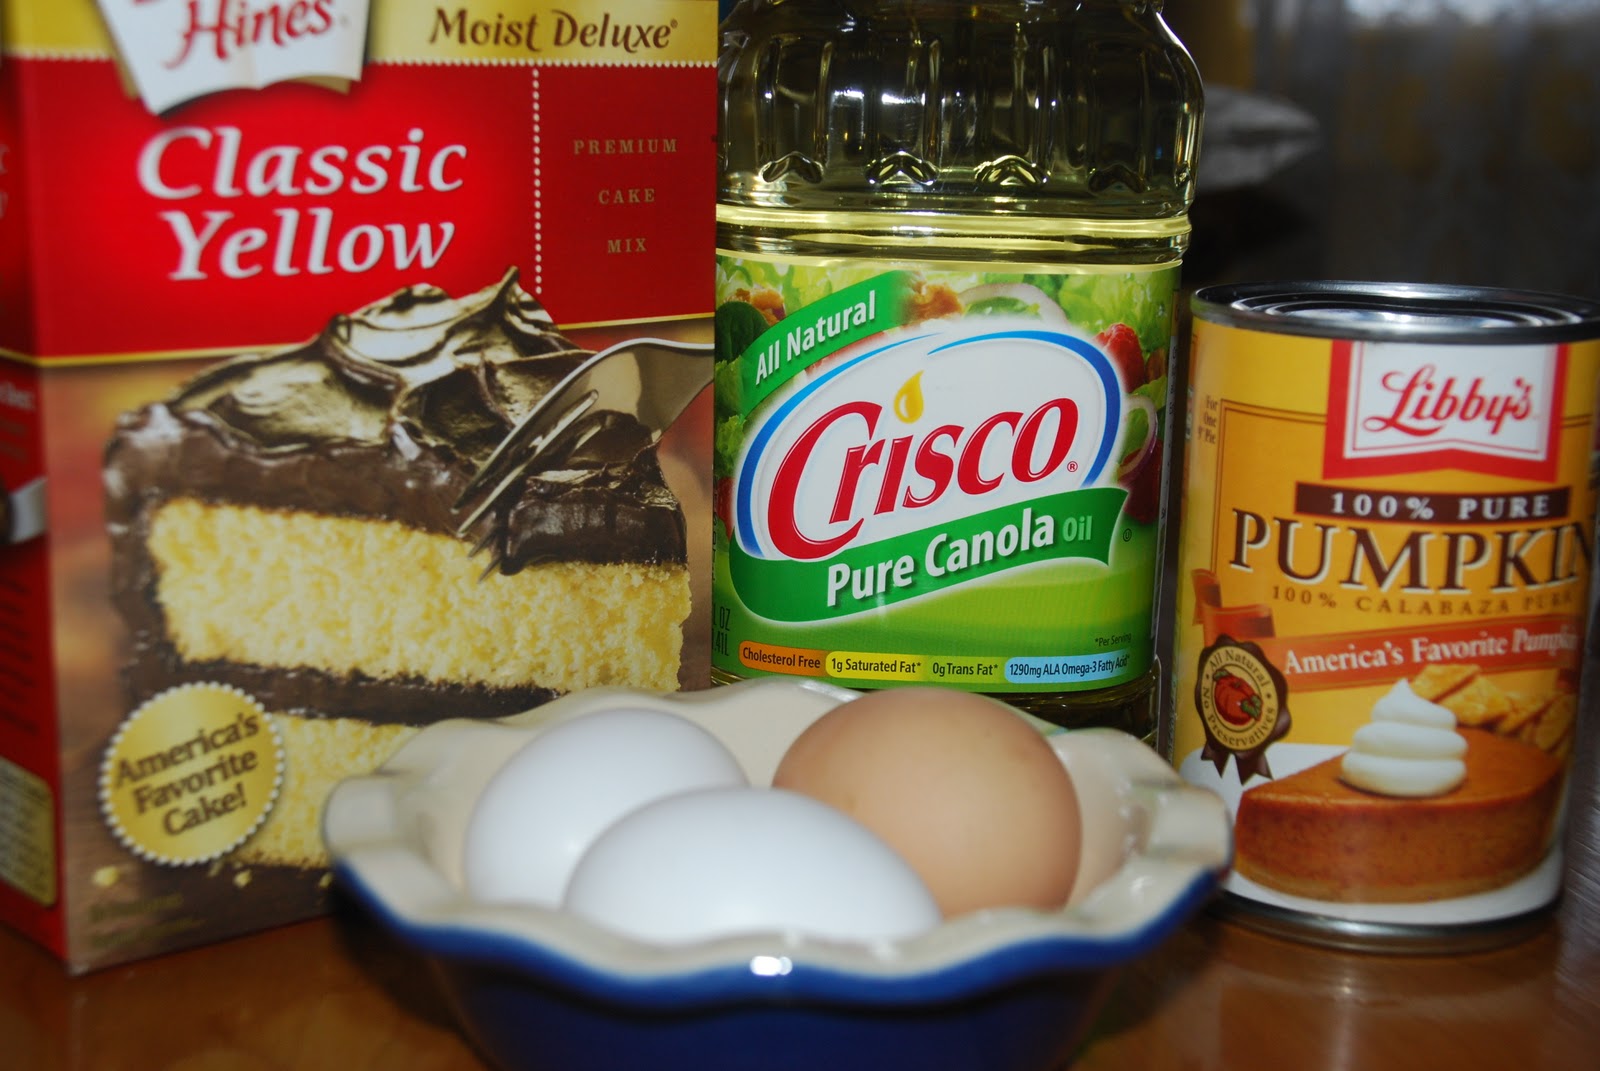
Mini Pumpkin Muffins
(recipe from Everyday Sisters)


Ingredients:
1 box yellow cake mix
1 can (15 oz.) pumpkin (NOT pie filling)
3 eggs
1/3 cup oil (I used canola)
sunflower seeds - optional - (I used chocolate covered sunflower seeds as that is what I had on hand... which worked out pretty well!)
Directions:
1. Preheat oven to 350 degrees F. Grease mini muffin tins or line with cupcake liners.
2. In a large bowl combine all ingredients except for sunflower seeds. Mix until well combined. 
3. Stir into batter sunflower seeds or you can wait until muffin batter has been scooped into tins.
4. Scoop batter into muffin tins.  I did so with my small scoop from Pampered Chef.

5. Bake for 11-13 minutes.  Cool for a couple of minutes in pan and then remove to serve and enjoy.


YUM!

A special thank you to Ellen, Nanci, Karen and Susan from Everyday Sisters for being part of the Secret Recipe Club so that I could have you as my first Secret Recipe Club blog.  Also, I'd like to thank Amanda who created this cooking club and Tami for hostessing my group.  I can't wait to find out which blog I get for the month of November!

Happy Mini Pumpkin Muffin Baking!

Friday, October 28, 2011

A PERFECT Bake Sale Cookie Recipe

Recently I made a new cookie recipe.  It had peanut butter in it and LOTS of chocolate chips.  It made a HUGE amount of cookies and they tasted AMAZING.  Every time I bit into one of the cookies all I could think of is how perfect the recipe would be for a bake sale.  Especially if the cookies were wrapped up in a pretty little package with a ribbon. :-) 


Now I just need to find an opportunity to make these cookies again!  Anyone have a bake sale coming up that you need some cookies for it?  Let me know if you do because I've got just the recipe destined for a bake sale.


Peanut Butter Chocolate Chip Cookies
(recipe from the lovely Jamie Cooks it Up! )

Ingredients:

1 cup butter, softened
1 cup peanut butter (I used smooth, Jaime used chunky)
1 cup sugar
1 cup brown sugar
2 eggs
2 1/2 cups flour
1 1/2 tsp baking soda
1 tsp baking powder
1/2 tsp salt
1 (12 oz.) bag semi sweet chocolate chips
1 (12 oz.) bag milk chocolate chips  (I stuck with just milk chocolate and used 2 bags of them instead of 1 of semi and 1 of milk)


Directions:

1. Preheat oven to 350 degrees F. Beat softened butter and peanut butter together in a standing mixer until light and fluffy - a good 4-5 minutes.

2. Add in sugars and eggs. Beat for another 2 minutes.  Mixture will appear frothy when it is done.

3. While butter, sugars and eggs are beating together combine dry ingredients in a medium size bowl.  Add dry ingredients to the beaten wet ingredients.  Mix all together for 1 minute.

4. Next add in chocolate chips and mix just until combined. Scoop out cookie dough onto cookie sheets lined with either parchment paper or Silpat.  I used my medium size scoop that I purchased from Pampered Chef

5. Bake cookies for 8 to 9 minutes - just until they start to crack. The cookies will appear that they need more time to bake but you do NOT want to over bake these cookies.  They will continue to bake on the hot cookie sheet after they come out of the oven.  I let the cookies sit on the cookie sheet for about 5 minutes and then removed them onto a platter.

So yummy! Enjoy!


Happy Peanut Butter and Chocolate Chip Cookie Baking!


LinkWithin

Related Posts with Thumbnails

ShareThis