Image Map
Showing posts with label Sweet Tart. Show all posts

Monday, August 3, 2015

Blueberry Shortbread Tart (SRC)

Each month for the Secret Recipe Club I get giddy with excitement.  This excitement is over discovering a wonderful food blog and recipe from said blog that I have been assigned to for the month, through the SRC.  Excitement over such a thing may sound silly, but seriously, it is the God honest truth.  This feeling is similar (I suppose) to discovering a chest of gold at the end of a treasure hunt.  As soon as my monthly SRC assignment comes to me via email, the hunt begins.  I use caution, diligence and great care as I search for that perfect gem of a recipe on my assigned food blog that gives my baking heart an extra beat in its rhythm and happiness in it's song. 


This month I am beyond delighted, beyond excited, and just plain old jumping up and down with happiness to share the recipe that I picked from Mother Would Know.  A recipe for,  Blueberry Shortbread Tart (also called Shortbread Tart with Jam).  Simple, delicious and amazing.  Really, really amazing.  Uniquely amazing at that.  I state this fact of "unique amazing-ness" because the shortbread crust is actually grated, that is right, GRATED, not rolled, but GRATED into the tart pan. Once the crust has been made it is then wrapped carefully in plastic wrap and then frozen in the freezer.  Then after it is fully frozen,  it is then GRATED into the precious tart pan (a pie plate or 9x13 baking pan can also be used), gently patted down into place and then layered with a fruit jam of your choice.  I chose blueberry as that is the fruit that my world revolves around at the moment.  Any kind of jam can be used.  Home made, store bought, whatever floats your boat. 


The best part of this treasure of a tart is that the list of ingredients can be counted on your two hands and the steps are as easy as 1, 2, 3 to make it.  I am a busy lady so discovering quick, easy and scrumptious recipes are definite keepers in my world.  I was able to whip up the shortbread, wrap it up tightly,  place it in the freezer, wrap up a shower gift, do both my girls hair and even change my outfit within a 20 minute period of time today.  Then, 4 hours later I completed the tart within just 15 minutes and popped it into the oven.  For me, baking often gets squeezed into the small gaps of free time.  This tart is the perfect example of such a need. 


Laura, who is the creative master behind, Mother Would Know, has a fantastic flare for collecting, producing and guiding her readers through her vast amount of delicious recipes.  If you like this recipe I am sharing today with you, just you wait as Laura's whole blog has recipes, one after the other, that are mouth watering, unique, beautiful and enticing.  I love the beautiful pictures she uses along with well written language and descriptions that go hand in hand with all of her recipes.  Provencal Vegetable Soup Au Pistou , Balsamic Blueberry Blast, Tuna Stuffed Tomatoes are just a few of the recipes I plan to make from Laura's collection in the near future. 


Huge hugs of gratitude to Laura for "welcoming" me into her lovely food corner of her world!  I feel honored and completely delighted to now have this precious recipe for Blueberry Shortbread Tart and I look forward to collecting many more treasures from Mother Would Know in the future. :-) 

Blueberry Shortbread Tart
(recipe discovered on Mother Would Know)

Ingredients:
2 sticks, unsalted butter at room temperature
1 cup sugar
2 egg yolks
2 cups flour
1 tsp baking powder
1/4 tsp salt
1 cup jam of your chose
1/2 cup fruit (to match jam flavor) - my addition 

Directions:

In a medium bowl whisk together flour, baking  powder and salt.  Set aside.

Beat butter until light and fluffy.  Add in sugar and beat for a good 2 minutes to incorporate well into the butter.  Add in egg yolks - beat to combine.  Slowly beat in flour mixture - mix until just incorporated.  

Wrap dough in plastic wrap and place in freezer for at least 2 hours - until dough is completely frozen. 

Preheat oven to 350 degrees F.  Using a hand grater, grate 1/2 of dough into a tart pan, pie plate or baking dish of your choice.  With your fingers, gently guide grated dough evenly all around your pan.  Tap down slightly.  Place remaining dough in freezer while you spread jam over crust.  Layer with fresh fruit and then grate remaining dough over the jam/fruit layer. 

Bake for 35-40 minutes.  Watch carefully so that edges of tart do not burn.  I used a pie shield (as did Laura) to help keep the edges from NOT burning. 


Remove tart from oven when it becomes fragrant and golden brown.  Cool tart for 30 minutes before slicing and serving.  Enjoy!! 


Happy Blueberry Shortbread Tart Baking!


Sunday, September 4, 2011

Rustic Blueberry Galette

Yum. Yum and MORE yum is all I can say about this AMAZING blueberry dessert.  I highly recommend you take this recipe and run to the closest kitchen, put on your apron (if you like wearing one when you bake/cook), check your pantry and fridge for the ingredients needed (if necessary go to the store to get what you are missing and then make this recipe.  You will NOT be disappointed


This delicious galette is filled with fresh blueberries - the original recipe (which I found at Simply Scratch) called for a mixture of fresh peaches and blueberries.  You could use just peaches and omit the blueberries all together. The recipe leaves plenty of room for creativity with fruit for it's filling.  The crust that surrounds the fruit is out of this world delicious! Tasty and very easily put together....especially if you use your food processor.  I made my crust in the beginning of the day put it in the fridge to get nice and cold and then brought it out of the refrigerator as I prepared the fruit filling for the galette.  You don't want to bring the pie crust out of the cold too long before you actually need it for then the butter in the crust will get warm and no longer provide a beautiful flakiness to your pie crust.


One of the best parts of this recipe is that warmed apricot or peach jam is gently brushed over the crust and fruit.  The jam provides a lovely sweet flavor that enhances the fruit filling and it gives a beautiful "rustic" color to the galette as it bakes in the oven. That Laurie from Simply Scratch is one smart cookie adding this special touch to her recipe! :-)


Rustic Blueberry Galette
(recipe from Simply Scratch- a beautiful food blog...beautiful!)

Pie Crust Ingredients:

1 1/2 cup AP flour
1 Tbsp sugar
1/2 tsp salt
1 1/2 sticks COLD unsalted butter, cut into pieces
1 egg yolk
3 Tbsp milk (original recipe calls for whole milk - I used 2%)
3 Tbsp peach or apricot preserves, warmed (which I warmed in the microwave in a microwave proof measuring cup for 30 seconds)


Filling Ingredients:
4 heaping cups of fresh blueberries (or you can use 3-4 cups sliced fresh peaches and 1 cup fresh blueberries)
2 heaping Tbsp AP flour
1 Tbsp cornstarch
1/4 cup light brown sugar
1 pinch of salt
1/4 tsp ground cinnamon
1/4 tsp ground nutmeg (optional)


Pie Crust Directions:


1. In a bowl of a food processor add the flour, sugar and salt - mix to combine.


2. Add in cold butter pieces and pulse until small pea size crumbles appear.


3. In a small bowl combine egg yolk and milk.  Pour into food processor and pulse just until combined. 

4. Take dough mixture out of food processor and put onto a piece of parchment paper.  Form dough into a large disk, wrap parchment paper around it and place in refrigerator to chill for at least 30 minutes.


Galette Filling Directions:


1. In a large bowl add fruit, flour, brown sugar, salt, cinnamon and nutmeg (if you choose to use it).  Gently toss all together.


2. Preheat oven to 350 degrees F.  Take your chilled pie crust out of fridge and carefully roll out into a 1/4" thickness of a circle - about 12" in diameter. Transfer rolled out dough onto a cookie sheet.


3. Pour fruit filling into center of pie crust....


....then carefully fold pie crust over fruit, pleating the crust as you go....

4. Warm jam on top of stove or in microwave.  Brush heated jam over all of crust and then drizzle the remaining over fruit filling.  Bake in preheated oven for 50-60 minutes - rotate pan half way through the baking time.  Cool 15 minutes before cutting and serving.


I served my galette just as it was but next time I have promised myself to serve it with fresh sweetened whipped cream or vanilla ice cream.  Yummy!  

Happy Rustic Blueberry Galette Baking!

Monday, September 20, 2010

Apple Crostata


Sometimes I discover a recipe and I know as soon as I take the first bite that I will make it again and again and again.  Other times unfortunately, I don't feel like I will repeat the recipe.  Well, with this scrumptious recipe for Apple Crostata I can not wait to make it again!!!!  Oh my, it is mouth-watering delicious!  The crust is super easy to make (especially if you have a food processor) and sooooo flaky good.  The apple filling is simple - the hardest part about it is prepping the apples (peeling, coring and then cutting into chunks).   The crumb topping is the final step to the recipe which brings this whole apple of a treasure dessert together....bringing in a cinnamon sweetness that just melts into the apples.

Go ahead and impress yourself - and your taste buds - and make this Apple Crostata....your eyes will roll back into your head with happiness and a fireworks worth of sweet deliciousness all at once when you take your first bite. 

The beauty of this dessert is that the next morning you can gently heat it up and have it for breakfast and it will taste just as amazing as the first time you enjoyed if not better - I know this personally for I had the last slice for breakfast the a.m. after I had made it....what a great way to start my day!  ;-)

Apple Crostata
(recipe adapted from Lovin' From the Oven which was found from Ina Garten)


Pastry Ingredients:


1 cup flour

2 Tbsp sugar

1/4 tsp kosher salt

1 stick unsalted butter, VERY cold and diced

2 Tbsp ice cold water


Filling and Topping Ingredients:


3-4 medium Macintosh apples (or baking apples of your choice)

1/4 tsp grated orange or lemon zest (I didn't have a single piece of citrus in my house so I used just a splash of lime juice)

1/4 cup flour

1/4 cup sugar + 2 Tbsp

1/4 tsp kosher salt

1/2 tsp cinnamon

1/4 tsp nutmeg

4 Tbsp unsalted butter, COLD and diced


Pastry Directions:

1. Place the flour, sugar and salt in the bowl of a food processor fitted with a steel blade. Pulse a few times to combine.

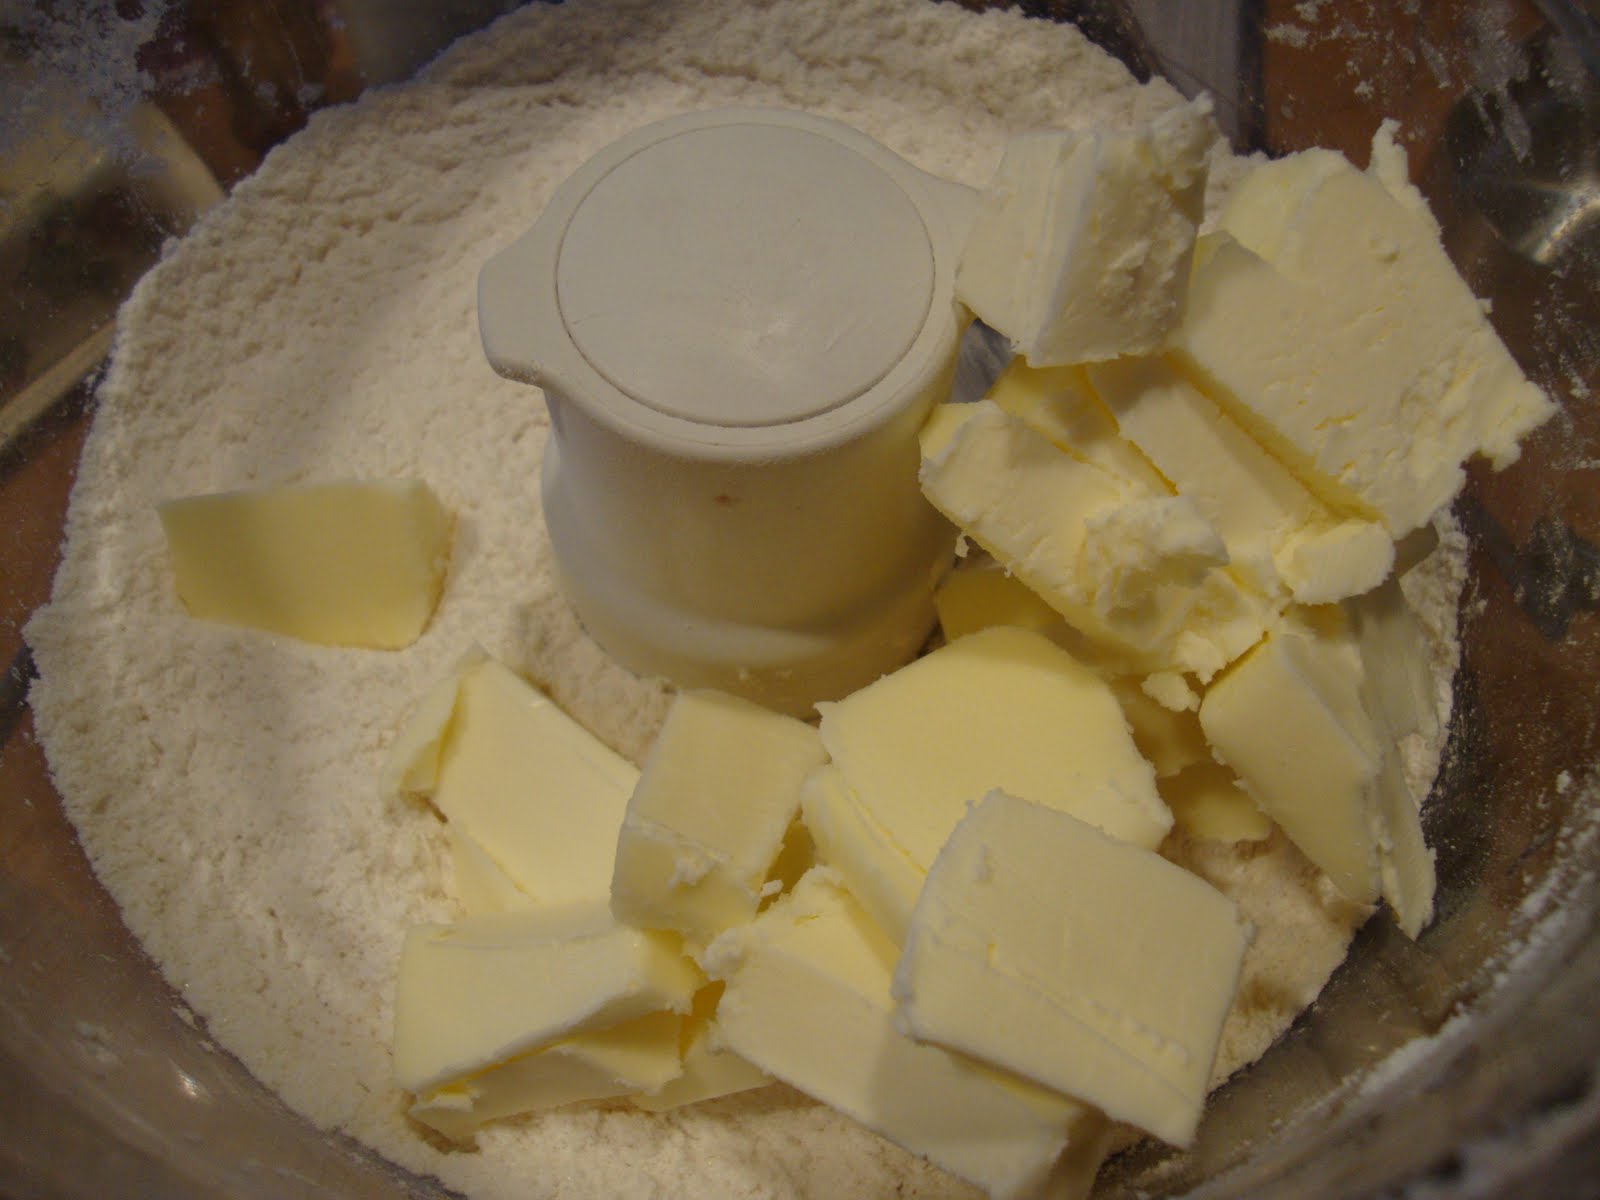
2. Add in the butter...


and pulse 15-18 times, or until the butter is the size of peas.

3. With the motor running add in ice cold water all at once through the feed tube. Keep hitting the pulse to combine, but stop the machine just before the dough becomes a solid mass. 

4.  Turn the dough out onto a well floured surface and form into a disc.  Wrap with plastic wrap and refrigerate for at least 1 hour.  Make filling and crumb topping while waiting for pastry dough to chill.

5. Peel, core and cut apples into 8th's then cut each wedge into 3 chunks ....


  Sprinkle with 2 Tbsp's of sugar and then the grated lemon or lime (in my case I sprinkled a dash of lime juice over the apples).  Set fruit aside.

6. Make crumb topping....start by combining flour, sugar, salt, cinnamon and nutmeg into a medium bowl.  Add in diced COLD butter and cut in with a pastry cutter (LOVE this kitchen gadget!!!) or 2 knives.  Topping should be nice and crumbly...


7. Preheat oven to 450 degrees F. Bring pastry dough out of refrigerator.  Roll out on a lightly floured surface to at least an 11" circle - I rolled mine out directly onto my Silpat and then transferred to a cookie sheet before I filled the dough.

8. Scoop apple filling onto the pastry dough.  If any liquid has accumulated with the apples be sure to leave it behind in the bowl.  You don't want any extra liquid at this point with the apples on the pastry dough.  Leave about 1 1/2 inch worth of a border around the  pastry dough....


....and then sprinkle crumb topping over apples....


... gently fold over the pastry border to surround the apples and topping...


9. Place crostata in preheated oven and bake for 20-25 minutes - until crust is golden brown and the apples are tender....


...Cool slightly and serve warm or at room temperature - good vanilla ice cream is a lovely partner with this dessert...or served alone is just as yummy!


Happy Apple Crostata Baking!

LinkWithin

Related Posts with Thumbnails

ShareThis