Image Map
Showing posts with label Strawberries. Show all posts

Thursday, June 18, 2015

Strawberry Lemonade Bundt Cake ~ #BundtBakers


 Believe it or not it's that time of the month that #BundtBakers present their creative creations of deliciousness.  This month the theme for #BundtBakers was chosen by the extremely talented,   Anne of From My Sweet Heart.  In the cake, on the cake, around the cake or all of it,  lemon was the theme.  Immediately I knew that I wanted to use the combo of strawberries and lemons.   Strawberries paired with lemons are lovely.  The sweetness of the berries balances out the tartness of the lemons and together they are a fantastic pair,   complementing one another fully.   


 I loved this cake from the moment I started mixing all the ingredients together.  The batter is flavored with grated lemon, lemon juice and a small amount of lemon extract.  All three lemon sources allow for the perfect lemon taste to the cake.  A delicate yet perfect lemon flavor shines in each bite of this cake.  Sour cream, butter and eggs all lend a hand in offering a richness to the cake too.  And then lastly the strawberries which are sliced and diced and then tossed with a little bit of flour and powdered sugar are folded into the batter to pair up with the lemon.  A perfection of a cake.


 A simple glaze of powdered sugar and lemon juice could easily be used to drizzle over this bundt.  I decided I wanted to have a bit of a fancier topping than just a simple glaze.  I also needed to cover up some of the areas on the cake that didn't release as gracefully from the pan as I had hoped.  I added some melted butter, lemon peel and dash of lemon extract to the powdered sugar and lemon juice to create exactly the topping I was after.  I was delighted visually as was my taste buds.  The frosting topped off the cake perfectly with decadence.


 Embrace the strawberry season as fresh strawberries are in abundance and bake up this cake.  Or buy some fresh strawberries at the super market if you can't pick them fresh.  This cake is perfect for those that want to impress yet simple enough to do so with truly very little effort.  


I send Anne big hugs of happiness for her fantastic choice of a "lemony" theme for our #BundtBakers group this month.  I enjoyed every minute of baking with lemons (and strawberries) by my side!   I also want to thank the creator of this group, Stacey of Food Lust People Love, for the amazing job she does to keep all the bits and pieces together to make the #BundtBakers such a fantastic group each and every month.  Merci beaucoup to both of you!!! 


Strawberry Lemonade Bundt Cake 
               (recipe adapted from I Heart Nap Time

Cake Ingredients-
1 cup unsalted butter, softened
2 cups sugar
3 eggs
2 TBSP fresh lemon juice
zest of 2 lemons
1/2 tsp lemon extract
2 1/4 cups flour
1/2 tsp baking soda
1/2 tsp salt
8 oz sour cream
1 1/2 cups fresh strawberries, diced
1/2 cup powdered sugar
2 TBSP flour 

Frosting Ingredients-
4 TBSP butter, melted
1 cup powdered sugar
zest of 1 lemon
1/2 tsp lemon extract
1-2 TBSP fresh lemon juice - more or less depending on what consistency you want

Directions -

Preheat oven to 375 degrees F.   Grease and flour bundt pan - set aside. 

In a medium bowl whisk together flour, baking soda and salt - set aside. 

In a large bowl beat together butter, sugar and lemon zest for 2-3 minutes.  Add in eggs, one at a time, beating well with each addition.  Add in lemon juice and lemon extract. 

Add to butter mixture the flour mixture and sour cream - alternating between the 2, starting and ending with the flour.   

In a medium bowl toss strawberries with powdered sugar and flour.  Gently fold strawberries into batter.  Pour batter into prepared bundt pan.  

Place cake into oven and reduce oven temperature to 325 degrees F.  Bake for 60 min - 1 hr and 10 minutes or until toothpick inserted into the middle of cake comes out clean.  Cool cake for 20 minutes before inverting onto serving plate.  Cool completely before frosting (or glazing).

While cake cools make your frosting.  Melt 4 TBSP of butter and pour over powdered sugar in a medium bowl.  Stir to incorporate.  Add in zest of lemon,  lemon extract and lemon juice and mix well.  Alter consistency of frosting by adding in more lemon juice if you wish. Pour over cooled cake, using a butter knife if needed to direct the frosting to a specific location.  Slice and enjoy!! 


Happy Strawberry Lemonade Bundt Cake Baking!


BundtBakers
#BundtBakers is a group of Bundt loving Bakers who get together once a month to bake Bundts with a common ingredient or theme. You can see all of our lovely Bundts by following our Pinterest board right here. We take turns hosting each month and choosing the theme or ingredient. Updated links for all of our past events and more information about BundtBakers can be found on our homepage.

Monday, May 4, 2015

{SRC} Breakfast Quesadillas


Do you ever find yourself stumped as to what to feed your kiddos?  I am constantly on the hunt for new meal ideas for my girls that are not only appealing to them but also healthy and well balanced.  This month my wishes were granted for a fantastic breakfast/snack to offer the girls.  It was through my fantastic Secret Recipe Club assignment for the month of May that I discovered, Breakfast Quesadillas on My Hobbie Lobbie


Trisha of My Hobbie Lobbie has a wide variety of recipes on her blog.  They range from a vast amount of delicious Goan food from India to healthy options for breads and even sinfully rich dessert recipes.  A well rounded collection of recipes. Honestly, it really wasn't easy for me to pick a recipe from Trisha's collection.  Just as soon as I picked one I would then find yet another one that I wanted to make.  But, as I stated above I am constantly keeping my eyes peeled for new, fun and healthy recipes to make for my precious girls. Breakfast Quesadillas won!  Winner for me and winner for the girls too.  They LOVED these delicious wedges of yumminess.  


The recipe calls for a tortia that is slathered with peanut butter and then layered with banana slices and sprinkled with dark chocolate chips.  Once the tortia has been folded in half it is then cooked in a frying pan on both sides until the insides become all warm and melty and the tortia is a pretty golden brown. Delicious.  And yes, healthy. 

I had lots of fun with this recipe as the second time I made it I switched it up a bit and made my own variation.  I made a scrumptious almond butter, maple cream and strawberry version.  Devine.  Deliciously devine.  


The possibilities are endless with these breakfast quesadillas.  Imagine making one with Nutella, almond butter and banana slices or even cream cheese and green olives for a savory version. Yum!  What version would you like best? 

Breakfast Quesadillas 
(recipe from My Hobbie Lobbie)  

Ingredients:
1 tortia - white or whole wheat
3 Tbsp peanut butter, smooth or crunchy
1/2 banana, sliced
10-15 dark chocolate chips 
non-stick spray, butter or coconut oil - for greasing your frying pan 

Spread peanut butter on 1/2 or all of tortia.  Place banana slices over PB and then sprinkle evenly with chocolate chips.  Fold tortia in 1/2 and place in a heated medium size frying pan that has been greased well.  Lower heat to medium-low and cook each side until golden brown, about a minute on each side.  Cut into wedges and serve.  Enjoy! 

Happy Breakfast Quesadillas Making!

Wednesday, March 25, 2015

Berry Cheesecake Bars


Whom ever invented cheesecake is simply brilliant! Completely and honestly brilliant.  There are so many wonderful flavors and special additions that you can develop into a cheesecake.  It can be sweet or a savory.  No matter what the flavor it is always decadent and delicious. And a cheesecake is the perfect kind of cake to celebrate a special occasion - especially a 15th wedding anniversary! 


 Today we celebrate the beautiful Camilla Mann of the food blog, Culinary Adventures with Camilla,  and her marriage to her beloved hubby of 15 blissful years with all things CHEESECAKE.  26 of us passionate food bloggers have gotten together and brain-stormed, created and baked to our little hearts content all things CHEESECAKE.  Sweet ones, salty ones, mini and large are all being featured together in unison to honor and rejoice over the Mann's 15 years of marriage.  The Mann's really like cheesecake.  Can you blame them?! I can't. 


I made a batch of Berry Cheesecake Bars just for today's event. I love the taste of berries and cheesecake served together so I was delighted to find this recipe which bakes berries right into the cheesecake.   Instead of making a cheesecake in the traditional form using a spring form pan, this recipe is created into bars using a 9x13 pan.   The crust is made out of a delicious mixture of flour, sugar, rolled oats and butter.  Simple ingredients coming together to make a wonderful foundation for these bars.  The filling only requires 2, 8oz. blocks of cream cheese compared to the normal 3-4 blocks in a spring form size cake.  And you can choose to add in lemon juice to provide a fresh tartness to the bars or opt out of such an addition. Completely up to you!  The berries that you use in this recipe can be fresh or frozen - it all depends on what is available to you and your preference.


I present to you a wonderful recipe for cheesecake bars packed with berries and full of delicious-ness.  Happy 15th Camilla and Jake!  Wishing you both many, many more years to come of your beautiful marriage along side an abundance of CHEESECAKES!! :-)

Berry Cheesecake Bars 
      (recipe from Beauty and Bedlam)

Crust ingredients:
1 1/4 cup all purpose flour
1 cup sugar
1 cup rolled oats
3/4 tsp baking powder
2/3 cup salted butter, melted 

Filling ingredients:
(2) 8oz. blocks cream cheese, softened
2/3 cup sugar
2 Tbsp all purpose flour  
4 eggs
1 tsp vanilla extract 
2 TBSP fresh lemon juice - optional
2-4 cups mixed berries, fresh or frozen


Preheat oven to 375.  Grease a 9x13 pan and set aside.  Prepare crust - in a large bowl combine crust ingredients -  flour, sugar, rolled oats and baking powder.  Mix well all together.  Pour in melted butter and carefully stir all together.  

Gently press crust mixture evenly into prepared pan with a plastic baggie over your hand (the baggie prevents the mixture from sticking to your hands).  Bake crust for about 15 minutes or until crust is golden brown.  Cool crust for 30 minutes.  Reduce oven heat to 325.

Sprinkle berries evenly over cooled crust.  Make filling by beating softened cream cheese until light and creamy in a large bowl.  Add in sugar and 2 Tbsp flour. Beat well all together. 

Add in eggs, one at a time - beating well with each addition.  Add in vanilla extract and lemon juice.  Once all has been mixed well together pour filling mixture over berry layer and place into 325 oven.  Bake for 40-50 minutes or until knife inserted into middle comes out clean and center feels firm to the touch.  

Cool cheesecake for 2 hours before placing in refrigerator to continue to cool for at least 3 more hours.   Cut into bars and serve.  Enjoy!! 


Happy Berry Cheesecake Bars Baking! 


Berry Cheesecake Bars by Baking and Creating with Avril
Cherry Cheesecake Bites by Cookaholic Wife
Chocolate Caramel Cheesecake by Dancing Veggies
Chocolate Cheesecake by My Hobbie Lobbie
Chocolate Topped Peppermint Cheesecake by Amy's Cooking Adventures
Creme Brulee Cheesecake Bars by Tara's Multicultural Table
Easter Basket Mini Cheesecakes by Little Bit of Everything
Everyday Cheesecake by Things I Make (for Dinner)
Irish Cream Cheesecake by A Day in the Life on the Farm
Layered Cinnamon Streusel Cheesecake Cake by Famished Fish, Finicky Shark
Lowfat Blackberry Cheesecake by A Kitchen Hoor's Adventures
Matcha-YuzuCheesecake with a Meyer Lemon Gelée by Culinary Adventures with Camilla
Mini Churro Caramel Cheesecake by Cheese Curd In Paradise
Mini Maple Pecan Cheesecakes by Join Us, Pull up a Chair
Mom's New York Cheesecake by Taste Cook Sip
Mudslide Cheesecake by Sew You Think You Can Cook
{No Bake} Marshmallow Cheesecake by An Affair from the Heart
No-Bake Pumpkin Cheesecake by Angels Homestead
Samoa's cheesecake by Goodie Godmother
Sopapilla Cheesecake Bars by The Savvy Kitchen
Sopapilla Puff Pastry Cheesecake by Pink Cake Plate
Skinny Vanilla Bean Cheesecake by Renee's Kitchen Adventures
Twix Cheesecake Brownie Torte by Making Memories With Your Kids

Monday, May 26, 2014

Mini VERY Berry Pies

 
I can honestly say that I may have discovered a new favorite recipe for pie crust.  Yup, that's right - pie. crust.  In all of my baking life (....that would be approximately 33 years of such a life as I started baking at the young age of 8) I have always kept an eye out for a delicious, foul proof, FLAKY and easy recipe for pie crust.  I have come across many a pie crust recipe that was either too dry, too difficult to make and even just plain old yucky tasting. 


Because I have been brought up to share well with others I will be sharing this fabulous pie crust recipe with all of you....including a beautiful berry filling and lovely streusel topping.  All of which will come together as Mini VERY Berry Pies!! Happiness. 


My happiness all started when I found out my May assignment for the Secret Recipe Club.  I was given the blog called, The Wimpy Vegetarian.  Let me tell you there is NOTHING wimpy about Susan's blog.  It is packed with gorgeous food and brilliant recipes. I was honored and delighted to have spent this past month browsing through Susan's recipes.  She is truly a talented lady in the kitchen and has a long list of amazing accomplishments in the cooking world.  I may just need to invite her over for tea the next time she ventures over to my neck of the woods.  Susan, you are amazing and you are always welcome in my home!


I almost made Susan's recipe for Peaches and Honey Frozen Yogurt as I would love a nice big bowl of frozen yogurt.  I then switched gears and planned on making her lovely Kale and Cauliflower Tart with Cheddar Cheese Crust - oh my goodness, what a beautiful looking savory tart it is! But then all bets were off when I read through her recipe for Mini VERY Berry Tarts as I was intrigued with the crust.  The pie crust is not only made in the food processor but it has CREAM CHEESE as one of the ingredients (along with butter, flour, salt, ice water and FRESHLY SQUEEZED LEMON JUICE!).  And then as I read through ingredients for the streusel topping for the mini pies I discovered that GROUND FLAX SEED was tossed in with the oats, brown sugar, butter and flour.  At the moment I have a tiny bit of an obsession over flax seeds.  I like to add it to everything. 
 
 
I was so pleased with how my mini pies came out.  Not only did they look good but the crust was over-the-top d'lish! Flaky.  Yes, very flaky.  And light not too dense at all.  The filling was also quite good although I do think that once berries are in season here in Southern NH, the filling will be even better.  I loved the streusel topping too.  I poured in those ground flax seeds with delight over knowing that my girls would get some extra nutrition when they ate their pies.  Happy mommy over here!
 
I made my pies in my favorite mini pie pans but Susan suggested making them in mini muffin pans.  What a great idea as the recipe will provide happiness for many more people than just 4 hungry mouths. 


Mini VERY Berry Pies
(recipe from The Wimpy Vegetarian)

Crust Ingredients:
1 1/3 cup flour
1 Tbsp granulated sugar
1/2 tsp salt
6 Tbsps unsalted butter, cut into 6 slices, well chilled
2 Tbsps cream cheese, well chilled
2 Tbsps + 1 tsp very cold water
2 tsps. freshly squeezed lemon juice

Streusel Topping Ingredients:
1/4 cup quick cooking oats
1/4 cup ground flax seeds
1 Tbsp flour
pinch of Kosher salt
2 Tbsp firmly packed brown sugar
2 tsp cocoa nibs (which I omitted as I didn't have on hand)
1/4 tsp ground cinnamon
1/8 tsp ground cardamom
3-4 Tbsps unsalted butter, softened

Filling Ingredients:
2 Tbsps granulated sugar
2 Tbsps flour
pinch of Kosher salt
2 1/2 cups fresh berries, rinsed and dried (I used cut up strawberries and blueberries - Susan used blackberries and blueberries)
2 Tbsp cream cheese
1 Tbsp coconut milk

Directions:

1. Preheat oven to 375 degrees F.  And then prepare pie crust. In the bowl of a food process add in flour, sugar and salt.  Pulse all together for a couple of times.  Add in chilled butter and cream cheese and pulse all together until slightly bigger than small pea sizes form - about 10-12 pulses.  Drizzle in cold water along with the lemon juice as the food processor runs.  Pulse just until the dough starts to come together forming moist crumbs that clump together.

2. Dump crust mixture onto a large piece of plastic wrap and form into a disc.  Wrap disc tightly and refrigerate for at least 30 minutes.

3.  Prepare streusel topping.  In medium size bowl combine oats, flour, ground flax seed, salt, cocoa nibs and spices until blended all together.  Add in softened butter with a fork or pastry cutter.  Mix and mash until all the ingredients are well blended and small crumbs form.  Place topping into refrigerator until needed.

4. Take out the chilled disc of crust from refrigerator and allow to come to room temp as you prepare berry filling.  In a large bowl add in flour, sugar and salt - mix all together.  Add in  1 cup of berries and slightly mash them with a fork.  Add in remaining berries along with cream cheese and coconut milk, making sure all ingredients are well blended together.

5. Roll out pie crust to desired size.  If you wish to use a mini muffin pan a circle cookie cutter will come in handy to make the right size crust for all the muffin cups. No need to grease your pan or pie plates.   Divide berry filling amongst your prepared pie crusts and then top evenly with streusel topping.  Bake in preheated oven for 27-30 minutes - until crust is a golden brown and filling is bubbly.  Cool for a good 15 minutes before serving.  Vanilla ice cream goes nicely with these little treasures. Enjoy!


Happy Mini VERY Berry Pies Baking!


Wednesday, May 21, 2014

Manhattan Cheesecake with Strawberries


The month of May has brought me the opportunity to participate once again with the lovely baking group called,  The Cake Slice Baker's.   You may recall that a few months back I made a delicious Old Fashioned Pound Cake along with an Applesauce Spice Cake.  Both of these cakes I made through the Cake Slice Baker's group.  This is a group of food bloggers that get together once a month and bake from Carole Walter's Great Cakes cookbook.  I love this cookbook!  Almost as much as I adore and treasure the Cake Slice Baker's.  Unfortunately, my blogging has taken a couple steps down on my list of priorities (due to life as a working mommy) and I haven't had the chance to bake along side the CSB's for quite a few months now.  I have also been working really hard at loosing weight and have been careful with the amount of carbs and sugar that I consume. BUT because my love for baking makes my heart sing, I have to every once and awhile take time out from crazy, busy life and my diet and treat myself (and others) to a yummy baked treat made with love from my kitchen to their mouths. 


 That being said, out of four options from the Great Cakes cookbook that was presented to the CSB's I choose to make the Manhattan Cheesecake.  I was super excited for this recipe as it was different than any other cheesecake recipe that I had ever made before.  Beaten egg whites, freshly grated lemon peel and orange peel were added into a beautiful batter of cream cheese, sugar, heavy cream, vanilla extract and egg yolks.  What could be better?! The cake came together lovely. I followed each step to. the. tee. The batter tasted divine. I decorated the cooled cake full of happiness with strawberries and raspberries that were gently glazed with an apricot glaze.  BEAUTIFUL all around.  But then, I cut into the cake.  And the cake was completely a mess.  I could have cried!!  Even though I had followed each word of instruction with careful attention - I added all the right ingredients at all the right times.  I baked the cake at the required temperature and timing. Yet still the cake was completely too soft.  I have no pictures of the sliced cake due to my sadness over it being undone.  I do highly recommend this recipe as it was delicious but please make sure you bake it for longer than 40 minutes.  I would suggest at least an hour rather than 40 minutes.

 
Invite some friends over and serve up this master piece.  They will love and worship you after the first bite.  
 
Manhattan Cheesecake with Strawberries
             (recipe from Great Cakes by Carole Walters)
 
Crust Ingredients:
10 double graham crackers, or enough crackers to make 1 1/2 cups of crumbs
2 Tbsp sugar
1/3 cup unsalted butter, melted
 
Cake Ingredients:
1 1/2 pounds cream cheese, at room temperature (24 oz - 3 blocks of cream cheese)
1 1/4 cups sugar, divided
5 large egg yolks
1/2 cup heavy cream
2 tsp vanilla extract
1 1/2 teaspoons freshly grated lemon rind
1 1/2 teaspoons freshly grated orange rind
3 large egg whites
 
Strawberry Topping:
3/4 cup apricot preserves
1 Tbsp kirchwasser or Grand Marnier
3-4 cups large, deep red strawberries
 
 
 Directions:
 
1. Preheat oven to 325 degrees F.  Generously grease a 9" springform pan - set aside.
 
2. Make crust by putting broken graham crackers into the bowl of a food processor fitted with a steel blade.  Add in sugar and pulse to make fine crumbs.  Add in melted butter and pulse for another 5-10 seconds so all ingredients are blended together.
 
3. Pour crumb mixture into prepared pan.  Using a spoon or the bottom of a glass press crumbs onto the bottom and up against the sides of pan.  Refrigerate when done.
 
4. Prepare filling by placing cream cheese into clean bowl of food processor.  Add in sugar and process for 15 seconds, then scrape down the sides of the bowl and process again for another 5 seconds.  Add in egg yolks while processor is running through the feeder tube and run for 10 seconds.  Add in heavy cream and the lemon and orange rinds.  Process for 10 seconds all together.
 
5. Beat egg whites in a large bowl of an electric mixer.  Beat egg whites until soft peaks form and then add in 1/4 cup sugar - 1 Tbsp at a time, beating until the whites are shiny. Fold in 1/4 of the filling batter with a large spatula, turning for about 10 times until mixture has lightened.  Add in remaining batter, taking an additional 30 turns.
 
6.  Pour batter into prepared pan.  Set pan on a 18" square of heavy-duty aluminum foil.  Mold foil around the sides of the pan to catch any batter that might leak.  Bake in preheated oven for 40 minutes - (This is where I would recommend that you bake for longer than 40 minutes as my cake was under cooked at this timing.....55 minutes to an hour would be my recommendation).
 
7.  At the end of the baking time, turn off the oven and place the handle of a wooden spoon into the door to keep it ajar. Cool the cake in the oven for 1 hour before taking it out, removing the foil and cooling to room temperature for at least 3 hours.  Refrigerate for at least 12 hours before putting the strawberry topping on the cake.
 
8. Prepare topping by heating preserves and liqueur in a medium size sauce pan over low heat.  Bring to a slow boil and continue to cook until preserves are completely melted.  Remove pan from heat and strain mixture through a fin strainer to remove the large pieces.  Return to saucepan and set aside.
 
9. Wash, hull and dry the strawberries.  Slice them in half lengthwise.
 
10. Arrange the berries cut sides down around the edge of the cake, with the points of the berries facing outward.  Arrange a second circle inside the first, with the points of the berries extending inward.  The bottoms of the berries should touch.  Fill in the center randomly and then make a second layer of strawberries over the first.  Cake can now be refrigerated until ready to serve. 
 
11.  Once ready to serve remove cake from refrigerator 1 hour prior to serving.   Just before you plan on serving the cheesecake, warm the preserves over low heat and then with a pastry brush, gently coat berries with glaze.  Serve with happiness!!
 
 
Happy Manhattan Cheesecake with Strawberries Baking!


Sunday, April 7, 2013

FRESH Strawberry Crumble Cake


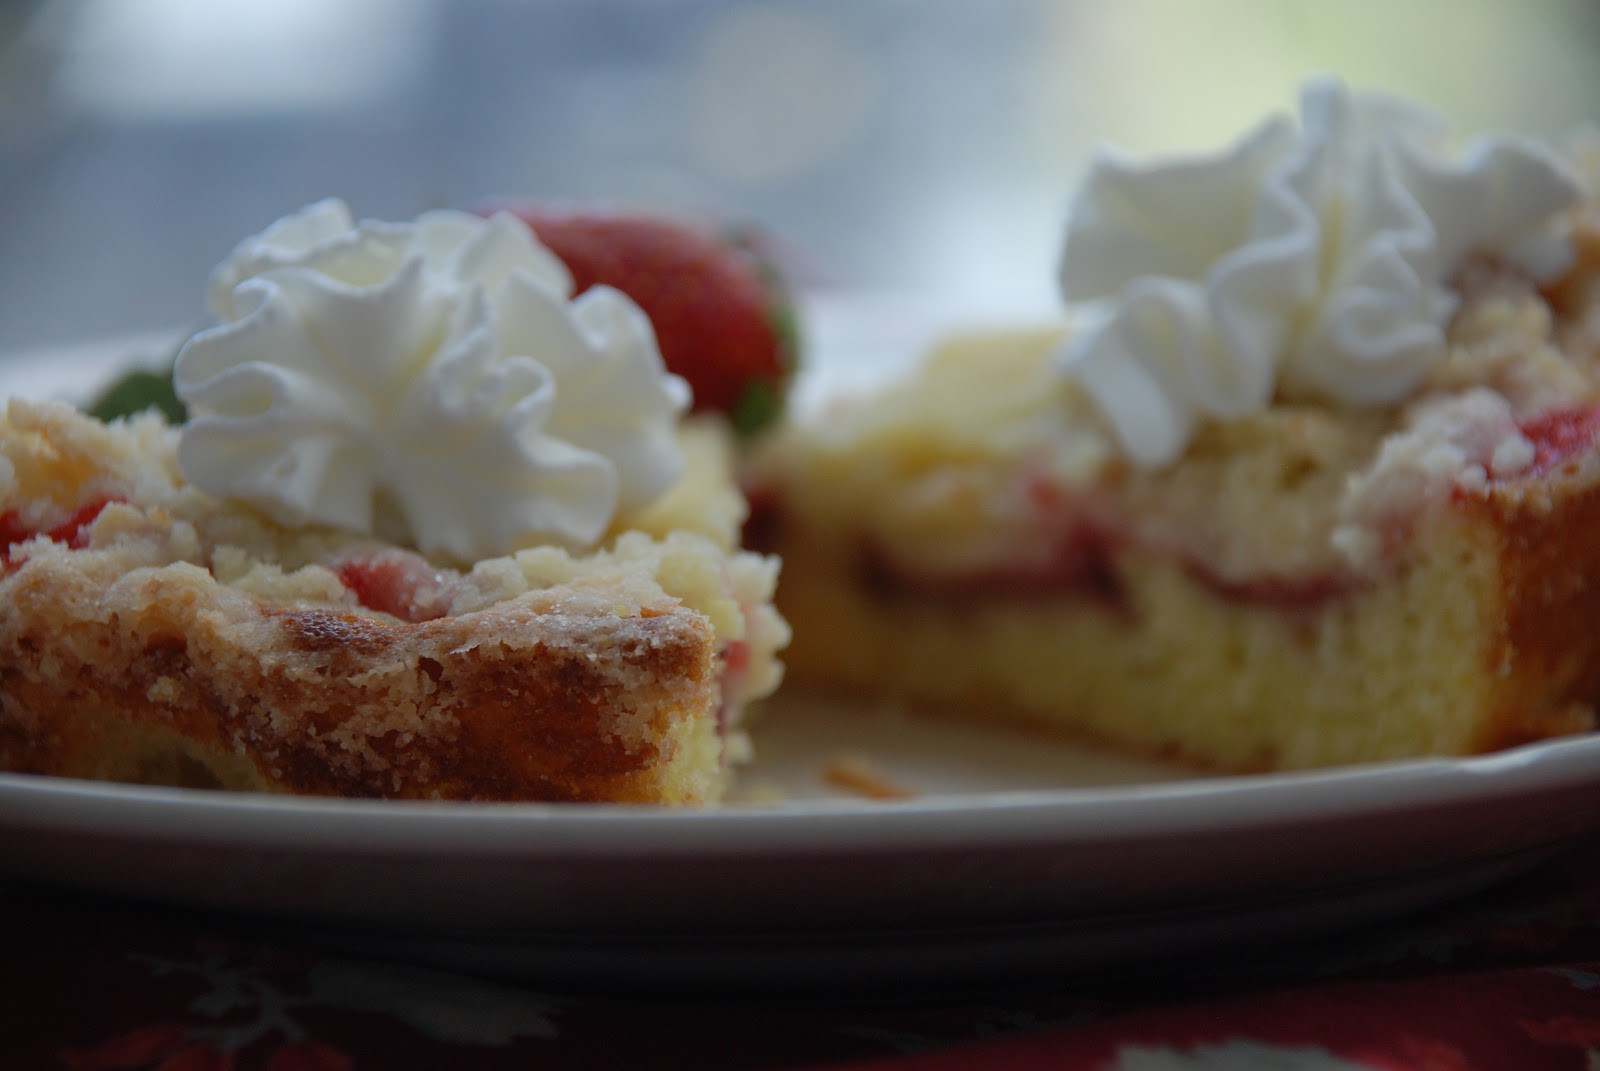
Strawberries have always been one of my all time favorite fruit.  They are beautiful.  They are RED.  And they are delicious....most of the time.  Lately the fresh strawberries in the market are definitely a beautiful red but their flavor is lacking in sweetness and are often quite tart.  In an effort to not waste the beautiful strawberries I had I decided to bake them into a cake.  I did a little search and research on the web and came up with a lovely recipe that fit my needs fully.  A simple cake that called for FRESH strawberries and tasted wonderful.  What more could I ask for! 


I was completely delighted with how easy this cake was to whip together.  Simple ingredients along with just a pie plate was all that is required to accomplish this recipe.  In the end you will have a beautiful cake that can be served anytime of the day.   My family enjoyed a slice for breakfast, as an afternoon snack for my girls, it paired lovely with a hot cup of afternoon tea for me and then of course served along side a scoop of vanilla ice cream or a dollop of whipped cream was also just perfect!
 
 
FRESH Strawberry Crumble Cake
(recipe discovered on Feathered Nest Studio which was then linked to Southern Food about.com)
 
Cake Ingredients:
1 cup flour
1/2 cup sugar
2 tsp baking powder
1/2 tsp salt
1/2 cup milk
1 egg
2 Tbsp melted butter
1 1/2 cups fresh strawberries, sliced
 
Crumble ingredients:
1/2 cup flour
1/2 cup sugar
1/4 cup COLD butter, cut into small cubes
1/4 cup chopped nuts (optional...I did not use nuts)
 
Directions:
1. Preheat oven to 375. Grease well a glass or ceramic pie plate (an 8x8 square baking pan would be fine too) and set aside.
 
2. In a large bowl sift together flour, sugar, baking powder and salt.  Whisk well all together.
 
3. Add in egg, milk and melted 2 Tbsp of butter to flour mixture.  Beat all together for 2 minutes and then pour and spread evenly into prepared pie plate.
 
4. Arrange sliced strawberries on top of cake batter.
 
5. Make crumble topping by adding together in a medium size bowl flour and sugar.  Add in COLD cubed butter. Cut into dry ingredients with a pastry cutter or with your fingers until mixture becomes small coarse crumbs.  If using chopped nuts add in now.  Sprinkle crumble topping evenly over sliced strawberries.
 
6.  Bake for 25-30 minutes or until edges of cake are a nice golden brown and a toothpick comes out clean if inserted into center of cake. Cool cake to desired temperature and serve.
 
YUM!
 
 
Happy FRESH Strawberry Crumble Cake Baking!
 
 
Here are a few other recipes that call for STRAWBERRIES on my blog...
 
 This recipe has been linked up to What's Cookin' Wednesday @ Buns In My Oven
 

Friday, May 4, 2012

Decadent Vanilla Layered Cake with Strawberry Frosting

Last month two events took place in my life. Two events which I had never experienced before.  One being that I turned 39 and the second was that I made myself a birthday cake.  Yup, that's right I am now 39 years of age. Simply amazing how that happens I tell ya!  And yes, this year was the very first year in my whole 39 years of life that I actually made myself a birthday cake.  I couldn't help it! - I came across the recipe for this cake and and just had to make it.

   It had ALL my favorite ingredients in it....such as, strawberries, butter, sour cream, heavy cream, lots of vanilla extract, cream cheese, seedless strawberry jam and lots more strawberries.  Definitely a cake that you have to make once a year as it is just decadent in taste, texture and sight.

  I adore strawberries.  I am passionate about strawberries. I also seriously adore layered cakes.  Layered cakes are meant for birthdays in my book. 

Honestly, baking this cake for myself was one of the best parts of my birthday celebration.  It allowed me to review and cherish the memories, my own personal growth along with all the treasured adventures I have had over the past year as I mixed up the batter, baked the cake and then assembled it all together. I have promised myself to make every attempt for my future birthdays to continue such a tradition.


Decadent Vanilla Layered Cake with Strawberry Cream Cheese Frosting
(recipe from the lovely and oh-so brilliant Perry's Plate)
Frosting Ingredients:
2 8-oz. packages of cream cheese, at room temperature
1 cup (2 sticks) unsalted butter, at room temperature
4 cups powdered sugar
1/2 cup seedless strawberry jam
3/4 cup heavy whipping cream
Cake Ingredients:
3 cups cake flour
3/4 tsp salt
1/2 tsp baking powder
1/2 tsp baking soda
3 cup sugar
1 cup (2 sticks) unsalted butter, at room temperature
7 large eggs
2 Tbsp vanilla extract
1 cup sour cream
6 Tbsp plus 1/3 cup seedless strawberry jam
2 lbs strawberries, hulled, sliced (about 6 cups)
Frosting Directions:
 Beat cream cheese and butter together in a large bowl until smooth.  Beat in sugar and then the jam - set aside.   Beat heavy cream in a separate bowl until stiff peaks form. Fold in whipped cream to the cream cheese mixture. Cover and chill for a couple of hours until it's firm enough to spread.
Cake Directions:
1. Preheat oven to 325 degrees F. Butter and flour two 9" cake pans.  Lining bottom of pans with parchment paper wouldn't hurt either. 
2. In a medium bowl whisk together flour, salt, baking powder and baking soda - set aside.
3. In a large bowl cream together butter and sugar until light and fluffy. Add in eggs one at a time, beating well after each additon.  Beat in vanilla extract. Add in sour cream and then beat for 30 seconds.
4. Add in flour mixture in three addtions, beating to blend after each addition.  Divide batter into prepared pans.
5. Bake cake 30-40 minutes or until toothpick comes out clean.  Remove cakes from oven and cool for 10 minutes before removing from pans to cool completely.
6. Once the cakes are fully cooled cut each one in half horizontally with a serrated knife. Spread 2 Tbsp's of jam and then 3/4 of frosting on bottom layer.  Then arrange 3/4 cup of sliced strawberries on top of frosting in a single layer and then top with another cake layer.  Repeat two more times with cake layers, jam, frosting and strawberries. Top with last cake layer and frost top and sides of cake with remaining frosting. Such a magical cake.  A very yummy magical cake.
Not the most perfect picture of the cake...but as you can see it is just delicious in every possible way.  And such a perfectly decadent birthday cake! Happy Birthday to me.
Happy Decadent Vanilla Layer Cake with Strawberry Frosting Baking!

LinkWithin

Related Posts with Thumbnails

ShareThis