Image Map
Showing posts with label Yeast Bread. Show all posts

Monday, November 2, 2015

Twisted Cinnamon Rolls for SRC


Baking up a batch of cinnamon rolls is truly one of my most favorite things to do as the weather gets cooler.  I believe it is the combination of the cinnamon sugary sweetness along with working with a puffy and soft dough to create such a treat that makes my baking heart so happy.   Beautiful Swanson of Chef in Disguise recently added a whole new level of happiness to my love for baking cinnamon rolls.  She has taught me how to make TWISTED Cinnamon Rolls from a gorgeous recipe that I discovered on her blog via my November Secret Recipe Club assignment. 


4 lovely layers of dough blanket melted butter which is then sprinkled with a cinnamon sugar coating on top of each dough layer.  The layered circle of deliciousness is cut into 8 portions which are then cut again with a slit in their centers.   The slit in the mid section provides the tip of each portion to be looped into it which creates the twist.  So much fun!  Swanson has created a perfect photo description of the process to make these twists.  Please check it out HERE


Chef in Disguise is a blog full of gorgeous food and recipes.  My sense of awe and amazement continued to grow each time I took a moment to look through the recipes and stories that exist on Swanson's blog.  Understandably I immediately fell in love with the Cinnamon Bread Twists.  I also have my eye on a recipe for preciously delicious little "tea bag" cookies 
along with a fascinating recipe for Spiced Banana Chocolate Jam  .  Not only will you find authentic and simple middle eastern recipes but well known  recipes that catch your eye because of the beauty shown through Swanson's photography and staging. 

I leave you now with this recipe for Cinnamon Roll Twists and hope that you take a moment to browse through Chef in Disguise for a delicious visual experience.  


I adjusted the recipe slightly as I slathered the twists with Maple Cream Frosting as requested by my family.  Not a bad request at all!  If you'd like to stick to the original recipe, pour sweetened condensed milk over the twists once they have cooled a bit from coming out of the oven.  Either way is d'lish.

Cinnamon Roll Twists (with Maple Cream Frosting)
      (recipe from Chef in Disguise)  

Dough Ingredients:
3/4 cup milk, warmed slightly
1/4 cup water, warmed slightly
1/4 cup sugar
1/4 unsalted butter, softened
1 egg
2 tsp yeast
3 1/4 cups flour
1/2 tsp salt

Filling Ingredients:
4 TBSP butter, melted
1/2 cup sugar
2 TBSP cinnamon

Maple Cream Frosting Ingredients:
2 TBSP butter, melted
1 1/2 cup powdered sugar
1 tsp maple flavoring
2-3 TBSP milk

Directions: 
In a large bowl mix together milk, water, sugar, butter, egg and yeast.  Set bowl aside.  

In a medium bowl sift together flour and salt.  Add sifted flour and salt to the wet ingredients and mix well.  Knead by hand or with a dough hook for a couple of minutes.  Place dough into a well greased bowl and cover with a clean dish cloth.  Allow to rise in a draft free space until dough has doubled in size - about 1 hour. 

Mix together 1/2 cup sugar and 2 TBSP cinnamon in a medium bowl.  Set aside.  

Once dough has doubled in size - take out of greased bowl and cut into 4 equal portions.  Roll out each portion into a circle.   Melt 4 TBSP's of butter and brush generously over each  layer.  Start first with one circle, brush with melted butter and then sprinkle with sugar/cinnamon mixture.  Do so 2 more times ending with the top layer of dough that should be just brushed with butter. 

Preheat oven to 375 degrees F. 

Cut circled layers into 8 equal portions.  In the center of each portion cut a slit that starts about a 1/2" from the top and ends at an 1" before the bottom (see a detailed picture HERE...scroll about 1/2 way down the post).  Take the tip of each portion and carefully loop through the cut slit - this creates the twist of the twist.  Pinch the wider ends of each portion together.  

Place twists onto a parchment paper lined round baking pan.  Brush twists with any remaining butter.  Place pan into preheated oven and bake for 20-25 minutes or until twists are lightly browned and baked through. 

As twists cool slightly mix together Maple Cream Frosting - in a medium bowl combine melted butter, powdered sugar, maple extract and cream.  Slather over slightly cooled cinnamon twists. 

Enjoy! 


 Happy Cinnamon Roll Twist Baking! 


Sunday, January 11, 2015

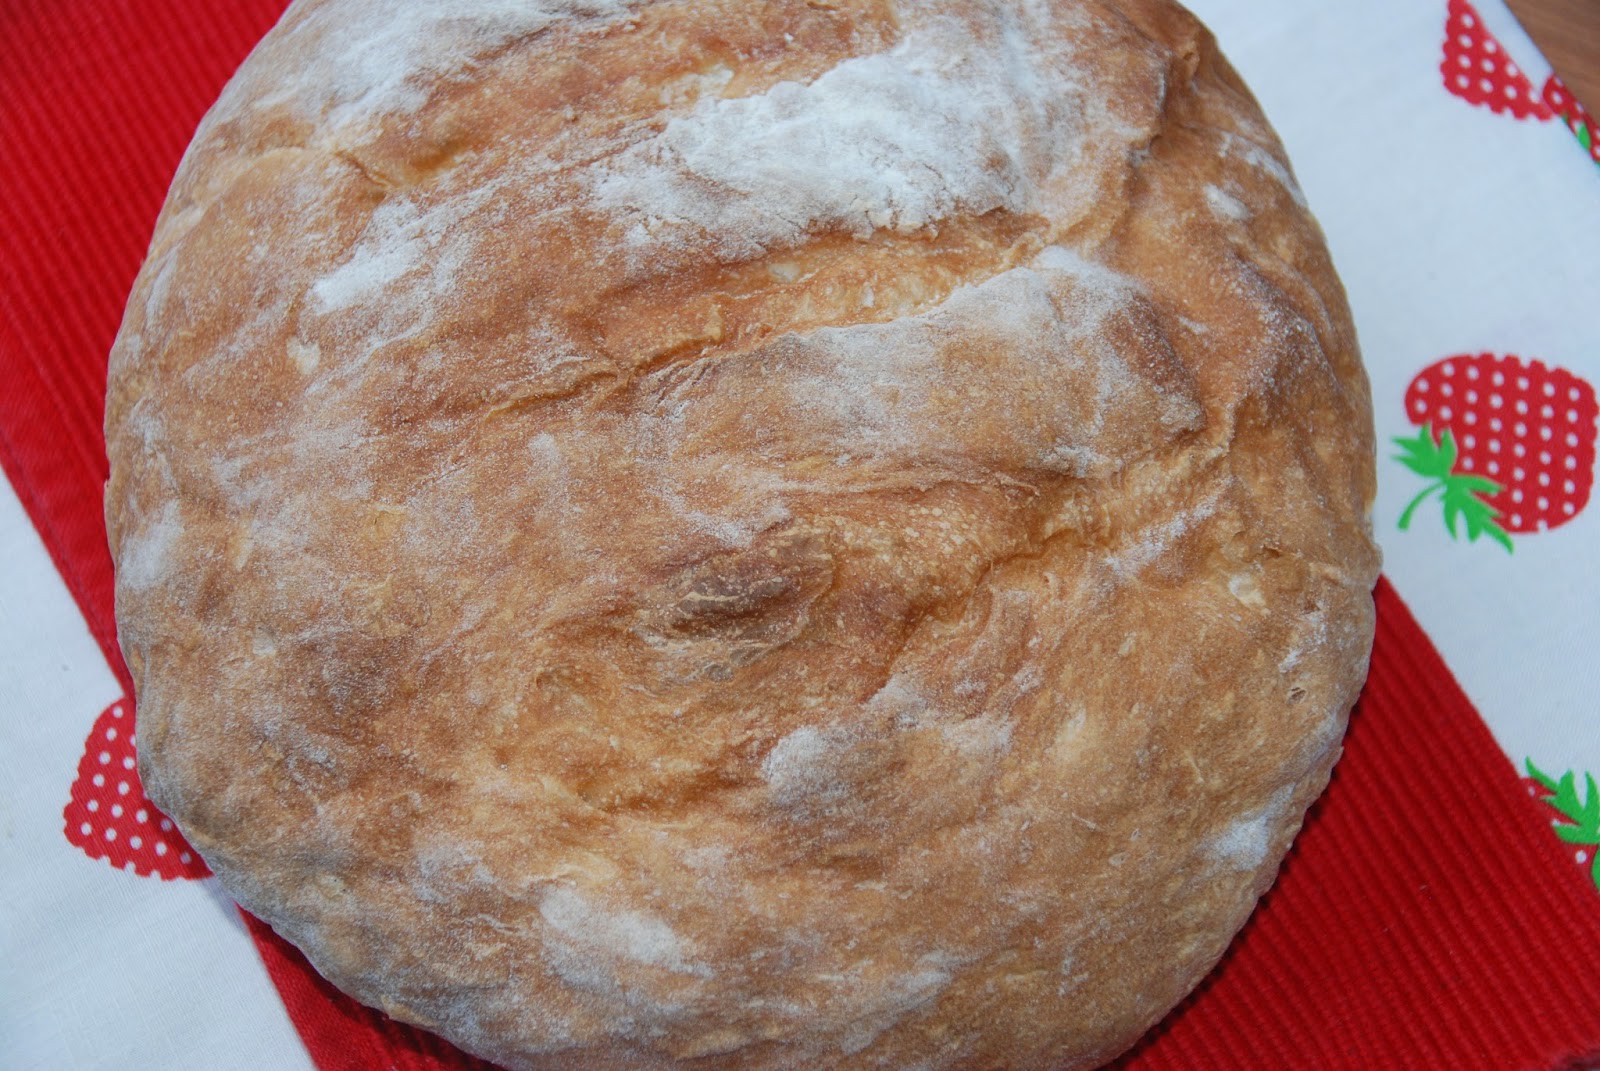
(EASY) Rustic Homemade Bread

2015 has officially arrived.  With this arrival I feel that it is important to enter into the NEW year with a really good recipe for homemade, made from scratch, delicious bread.  Who can't use such a thing? I guess those that are living a gluten free life-style might fall into such a category - but for those bakers and gluten eating people out there, this recipe that I share with you today will be greatly and fully appreciated.  


It is a super simple recipe.  It makes TWO large loaves and uses only 4 ingredients (yeast, flour, salt and water).  And the best part is that it is mixed, risen, shaped, risen again, baked and placed into your mouth all within a 3-4 hour period of time. You really can't go wrong by making this recipe.  It is completely the best thing since sliced bread in my opinion.  And yes, it does even slice well.


My family enjoyed it first straight out of the oven with a little smattering of salted butter along side a hot cup of tea.  We then moved onto lightly toasting the bread and layering on butter and jam.  Goodness was that just divine!


We also made big fat tuna melts on it and then delicious french toast.  The french toast was my favorite if you were wondering.  Although I do have to say that when I had the bread toasted and buttered it and then laid on some Bonne Maman mixed berry jam my heart did do a little pitter patter of happiness.  It was just SO good. 

So join me in my happiness over this Rrrrrustic Homemade Bread recipe and grab your yeast, flour, salt and water to mix up a beautiful dough.  You can thank me later.


Rustic Homemade Bread 
(recipe discovered on Somewhat Simple)  
makes 2 large loaves 
 
Ingredients:
3 cups warm water (not too hot as you don't want to kill the yeast)
1 1/2 tablespoon yeast - I used fast-acting but regular is fine too
6 1/2 cups flour 
1 tablespoon salt  

Directions:

1. In a large bowl sprinkle yeast over warm water and gently stir.  Let sit for 10 minutes so the yeast can really come alive and grow.

2.  Add in flour and then salt to the yeast and water mixture.  Stir all together until no remaining dry spots .  Cover bowl with a clean dish towel and then place bowl in a draft-free location.  All dough to rise for about 1-2 hours - it will double in size.  My dough only took 1 hour to full rise - it all depends on how warm your home is.  

3. Once dough has doubled in size divide in half and place each half on a piece of lightly floured parchment paper.  Gently form into a nice rounded bread shape.  Flouring your hands will help for this step.  Cover your breads and allow to rise again - about 30-45 minutes. With a serrated knife cut three slits across each bread.....


4. Preheat oven to 450 degrees F.  Place parchment paper and bread dough onto an upside down cookie sheet or pizza stone and then pop into the oven.  On the rack below the bread place a large roasting pan and fill with water about 1" high.  The steam from this water will give your bread a lovely crusty crust.  Yum! I baked the loaves of bread one at a time.

5. Bake bread for 24-28 minutes - until loaf of bread is a beautiful golden brown.  Cool, slice and enjoy! 


Happy Rustic Homemade Bread Baking!

Monday, August 25, 2014

Oatmeal Molasses Bread


Today I made bread.  TWO loaves of delicious beautiful bread in fact.  The bread feed my family which in turn feed my heart.  Sappy I know but the honest truth.  For the past two weeks I have been blessed with the presence of three family members that live in France. I am lucky if I see my French every couple of years.  Every minute of our time together has been filled with adventures, laughs, amazing food, lots of wonderful chats and beautiful memories to cherish of one another.  In an effort to comfort myself with their impending departure and to provide a delicious addition to our time together I decided to make bread.  Oatmeal Molasses Bread at that! A soft in the inside, crunchy crust on the outside,  full flavored bread.  A magical bread in fact and I have Renee from Kudos Kitchen by Renee
to thank for the recipe.


Kudos Kitchen By Renee has been my August assignment for the Secret Recipe Club.  I just love Renee!  I have been following her blog for quite some time now.  Not only does she create delicious recipes full of beautiful food but she is in amazing artist.  I have had my eye on her custom made mugs.  I may need to drop a hint to Santa for a special Christmas gift (wink, wink). 


I will leave you today with the gift of this recipe.  It is a generous recipe that makes 2 BIG beautiful and fragrant loaves.  Molasses, oats, whole wheat and unbleached all purpose flour and yeast are the simple ingredients that make up this treasure of a bread. It provides happiness to the tummy and comfort to the heart.  Merci Beaucoup Renee for sharing this recipe with me. You are a gem! In turn I pass on this recipe to all of you! Enjoy!

Oatmeal Molasses Bread  
(recipe from slightly adapted from Kudos Kitchen by Renee)

Ingredients:

2 packages of active dry yeast (4 1/2 tsp)
3/4 cup warm milk (I used almond milk as that was all I had on hand)
1 1/2 tsp granulated sugar
2 cups oats (regular or quick is fine)
2 1/4 cup boiling water
3 1/2 cups whole wheat flour
3 1/2 cups all purpose flour
1/4 cup butter, melted
3/4 cup molasses
1 TBSP salt

Directions:

1. In a small bowl, gently mix the yeast, room temperature milk and sugar all together.  Let this mixture set for a good 10 minutes to allow the yeast to proof (it will get nice and foamy).
2. In a large bowl pour boiling water over the oats and mix well.  Let sit for a bit as the water absorbs into the oats.  Then add in molasses, melted butter and salt.  Mix well all together.

3. In another large bowl (Renee suggests using the bowl of a stand mixer with the dough hook or a regular bowl with a wooden spoon) combine flours.

4. Add in oats/molasses mixture to the flour.  Stir by hand or with dough hook to combine slightly.  Add in yeast mixture.  This will call for a little extra time as you knead all of the ingredients together.  The dough will be heavy and dense but well worth all the work.  Make sure it is well combined. 

5. Transfer dough into a oiled bowl. Cover with a clean kitchen towel and place in a warm location without any drafts.  Allow dough to double - this will take about 1 hour. Once dough has doubled, punch down and then divide in half.  Shape gently in loaves and place into greased loaf pans.  Again, allow breads to rise in a warm location without any drafts - about 45 minutes to 1 hour. 

6. Bake breads in an oven of 350 for 45-55 minutes.  Breads will be done when they sound hallow when tapped. Cool breads for 15 minutes before taking out of pans.  Cool completely before slicing to enjoy. 


Happy Oatmeal Molasses Bread Baking!


Wednesday, January 26, 2011

A Wonderful Winter Bread

About 2 weeks ago I started this post.  I had a couple finishing touches that I wanted to do before I posted it and told myself that the next morning I would do so and then push the lovely "publish post" button so that I could share this yummy bread recipe with all of you.  Well, something very special happened before I could do those last minute touches to this post....my water broke at 1:20 in the a.m. and I went into labor.  About 3 1/2 hours later I gave birth to beautiful Colette.  Here she is all snuggled up on my sister....


Needless to say I wasn't able to sit down at my computer the next morning and complete the last touches to this post!  I am slowly getting back on my feet and finding a rhythm to my day that involves a couple more things other than nursing, changing diapers and caring for little Coco and Jolie.  Please don't give up on my blogging as I have every intention to get back into a regular routine of doing so. To all of my food blog friends I miss checking you out on a daily basis! - I feel like I have so much to catch up on. :-)

In the mean time here is my blog post that I started a few weeks back....it's kind of fun to read that I was still pregnant with Colette when I originally wrote this post. :-)


**********************

Yes, I have yet to have my baby (as of 9pm on 1/11/11).  We are all waiting patiently.  Every day I wake up and wonder, will this be the day?!? And then in an effort to keep busy I tacile one more project in preparation for the baby's arrival.  I also find something wonderful to bake or cook  just to keep busy and active.  Needless to say my queue for blogging recipes is FULL!  - this is a good thing for I have a feeling that once the baby arrives my flexibility and time will be taken up by the tiny Bambino.  Can't wait!!!

Last week I was blessed to have a day with my mom.  I had been wanting to make bread and had found a wonderful recipe in a small Taste of Home magazine that I had picked up at the super market earlier this year.  In this little magazine I found a recipe for Swirled Pumpkin Yeast Bread.  A hearty bread cock full of delicious flavor and color from the pumpkin puree and plump raisins mixed into this lovely bread.  My family ate the bread toasted with butter or peanut butter.  I also made a lovely french toast with slices of this bread dipped in a mixture of egg, milk, vanilla and ground cinnamon.  Super yum bread with so many possibilities.


I do have to say that one of the hardest parts of making this bread was the kneading process.  Thankfully my mom was with me and was able to put her strength and non-pregnant body into helping with this part.  Because she is a little bitty of a woman my mom had to gain some height for extra strength so she kneeled on a stool to really get "on top" of the bread....


At one point she had to really put her body into the kneading and she actually stood up from a kneeling position on the stool to a standing position.  Mothers are so great!  Here is an "action" shot of her kneading....


Swirled Pumpkin Yeast Bread
(recipe from Taste of Home)
Recipe makes 2 loaves of bread

Bread Ingredients:

4 1/2 - 5 cups AP flour

3 cups whole wheat flour (I used WHITE whole wheat flour)

2 cups oats (I used regular although quick-cooking was recommended)

2/3 cup packed brown sugar

2 1/2 tsp pumpkin pie spice

1 1/2 tsp salt

1 tsp sugar

2 packages (1/4 oz each) active dry yeast

1 1/2 cups warm water (120 - 130 degrees)

1 cup pumpkin puree

1/3 cup unsweetened applesauce

1/3 cup canola oil

2 eggs, lightly beaten

1/2 heaping cup raisins


Filling Ingredients:

1/4 cup butter, softened

1/2 cup packed brown sugar

1 tsp ground cinnamon


Bread Directions:

1. In a large bowl combine 2 cups AP flour, (white) whole wheat flour, oats, brown sugar, pumpkin pie spice,  salt,  sugar and yeast.  Add in warm water, pumpkin puree, applesauce and oil - mix until just moistened.

2. Add in eggs and beat until smooth. 

3. Stir in remaining AP flour to form a firm dough then add in raisins.

4. Turn dough onto a lightly floured surface; knead until smooth and elastic - about 6-8 minutes.  Place dough in a greased bowl, turning once to grease all of the dough...


  Cover dough and let rise in a warm place until doubled - about an hour...


5. Punch dough down.  Turn onto a lightly floured surface, cut in half....


  Roll each portion into an 18"x9" rectangle.   Brush each dough rectangle with softened butter within 1/2" of the edges....


  Combine brown sugar and cinnamon and then sprinkle over buttered dough.  Roll up jelly-roll style, starting with a short side.....


  Pinch seams to seal.

6. Place each dough roll seam side down in two greased 9"x5" loaf pans. Cover pans and let rise until doubled - about 30-45 minutes....


  I buttered my risen breads just before I popped them into the oven....just an added touch on my part.

7. Bake breads in a preheated 350 degrees F. oven for 55-65 minutes or until golden brown.  Cool for 10 minutes before removing from pans to wire racks to cool completely.  

Slice and enjoy as you please!


Happy Swirled Pumpkin Yeast Bread Baking!

Tuesday, November 16, 2010

Danger Dog Yumminess....Homemade French Bread


Yes, this is a serious "Danger Dog Yumminess" situation - Homemade French Bread.  And even more serious.....it is EASY to make.  It does take a little time to get to the finale result of this delicious bread but over all it is a VERY easy bread to make.  The grand prize gives you TWO loaves.  Yes, TWO! - sooooo exciting!!!!

And where did I come up with this lovely little recipe you ask?  The answer I say is, "Where I find SO MANY super amazing recipes.....Tasty Kitchen".  Yup, after getting it in my head that I wanted to make French Bread this past weekend I let my fingers do the walking and typed myself on over to TK to quickly find a recipe that began with the word, "EASY" and also contained  the words,  "Homemade French Bread" = Easy Homemade French Bread.  Then as I read the reviews and comments of this recipe by the lovely member of TK named, grammydenise I found that EVERYONE gave rave reviews with excitement and delicious happiness. Yahoo, I had found my recipe and went for it!  Do you want to go for it and make this bread? Good....I thought you'd say so!

Just a little note...because I was making this bread and a wonderful soup (recipe to come soon) I kinda had my hands full and didn't take my usually step-by-step photos.  If you have any questions please do ask....I am here for you. :-)

Easy Homemade French Bread
(recipe from grammydenise on TK)

Ingredients:

1/2 cup WARM water

2 packages (7g packet) dry active yeast

2 cups HOT water

1/3 cup oil (I used canola oil)

3 Tbsp sugar

1 Tbsp salt

6 cups all-purpose flour - divided

1 egg white (for brushing on bread just before baking)


Directions:

1.  Combine the WARM water and the yeast in a bowl.   Set this bowl aside.

2. In a large bowl, combine 3 cups flour, HOT water, oil, sugar and salt.  Stir with
a wooden spoon.

3. Add in yeast mixture and stir.

4. Add in remaining 3 cups of flour and stir.  At this point you may need to your use hands to combine the flour completely. 

5. Let dough rest for 10 minutes.  Set a timer.  Your timer will be your close friend for the rest of this recipe.

6. Stir dough again and let rest again for another 10 minutes.

7. Repeat this process (stir and rest) 3 more times - for a total of 5 times.  I found that by making a check mark for each time of "stir and rest" it helped me keep track of each cycle.

8.  At the end of the 5th "stir and rest" cycle divide dough in half. 

9. Take each half and place on a well floured surface.  Press out each half into a rectangle.  Roll up individual rectangles starting on the longest side (just like you are rolling dough for cinnamon rolls).  Set each roll of bread dough on a greased cookie sheet.

10.  Let bread rise in a warm place for 30 minutes.  Preheat oven to 400 degrees F half way through the rising time.

11. With a sharp knife, make 3-4 diagonal slashes across each loaf.  Brush with egg white.

12. Bake in oven for 25-30 minutes. Bread will be a gorgeous golden brown when done.  Remove breads from baking sheet to a cooling rack.  Slice and serve with proud happiness!

 Jam and butter are wonderful accompaniments to this bread fresh out of the oven.....


Or a delicious soup! (I can't wait to share with you the Italian Tomato Tortellini Soup I made to go with this bread!!!!.....patience Darlin', patience.)
Happy Easy Homemade French Bread Baking!

LinkWithin

Related Posts with Thumbnails

ShareThis